nDesigner Pro (NEW) - nPhoto's software
Introduction to nDesigner PRO - nPhoto's software
nDesigner PRO is our free online photo product designing deal . It offers you two modes to work in, Smart Designer and Design.
Smart Designer - is a smart creation mode that allows you to instantly create a project using auto-creation and other automatic functions. Such project can then be freely modified.
Design - is an expanded mode with full control over the project. You have freedom of creation and you also can take advantage of built-in layouts and objects like backgrounds, clip-arts, masks, and frames.
In both nDesigner Pro modes, you can use photographs previously uploaded to the Photos section.
The Preview section allows you to view the designed Photo Album or Photo Book.
Application requirements
Recommended browsers: Chrome, Opera, Mozilla Firefox.
Image format: jpg/jpeg, png, heic, heix, avif
Max image size: 40 MB
Max image resolution: 60 mpx
Maximum dimension of the photo is 15,000 pixels on the long side
The nDesigner Pro works with thumbnails therefore, the full-resolution images uploaded may appear blurry or pixelated in the program, don't worry though, the product will be printed with your full-resolution files. The nDesigner Pro will inform you of any image that is of low or very poor quality.
A kind reminder that projects in the Online Designer are kept for 90 days if left unattended (are not ordered).
To keep your files for later project completion please log in to your nPhoto account, go to your cart and simply click on the Edit icon (next to the magnifying glass) to resave your project. This will prolong the longevity of your project for another 90 days. We will be notifying you 30 days and 3 days before your project is deleted.
How to start a project in nDesigner PRO?
- LOG IN on our website and enter the nShop.
- Choose any Photo Album, Photo Book Pro, DreamBook 4K or Photo Book Basic, personalise the product and add it to the basket.
- IMPORTANT: Some of the choices you make cannot be changed after you design your project (changes like product line, format etc.).
- To start designing click DESIGN ONLINE in the cart, next to spreads/pages or cover.

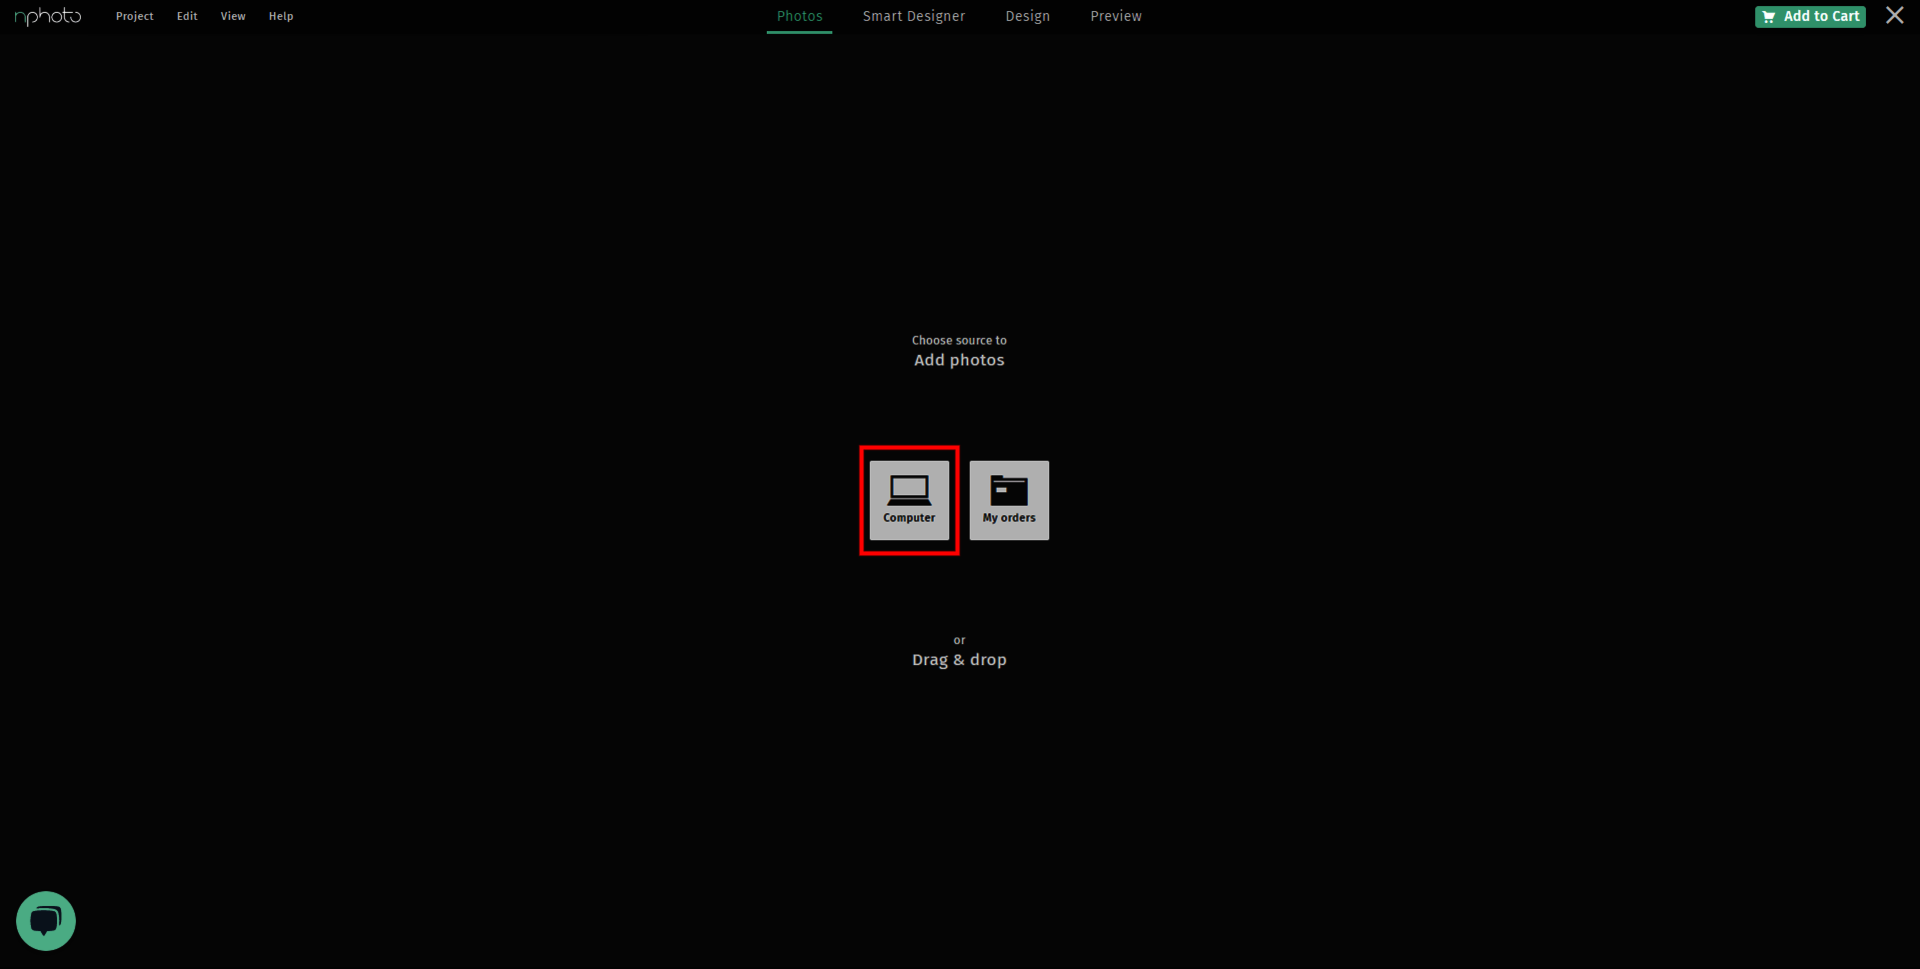
1. Uploading photos
a) Directly from PC:
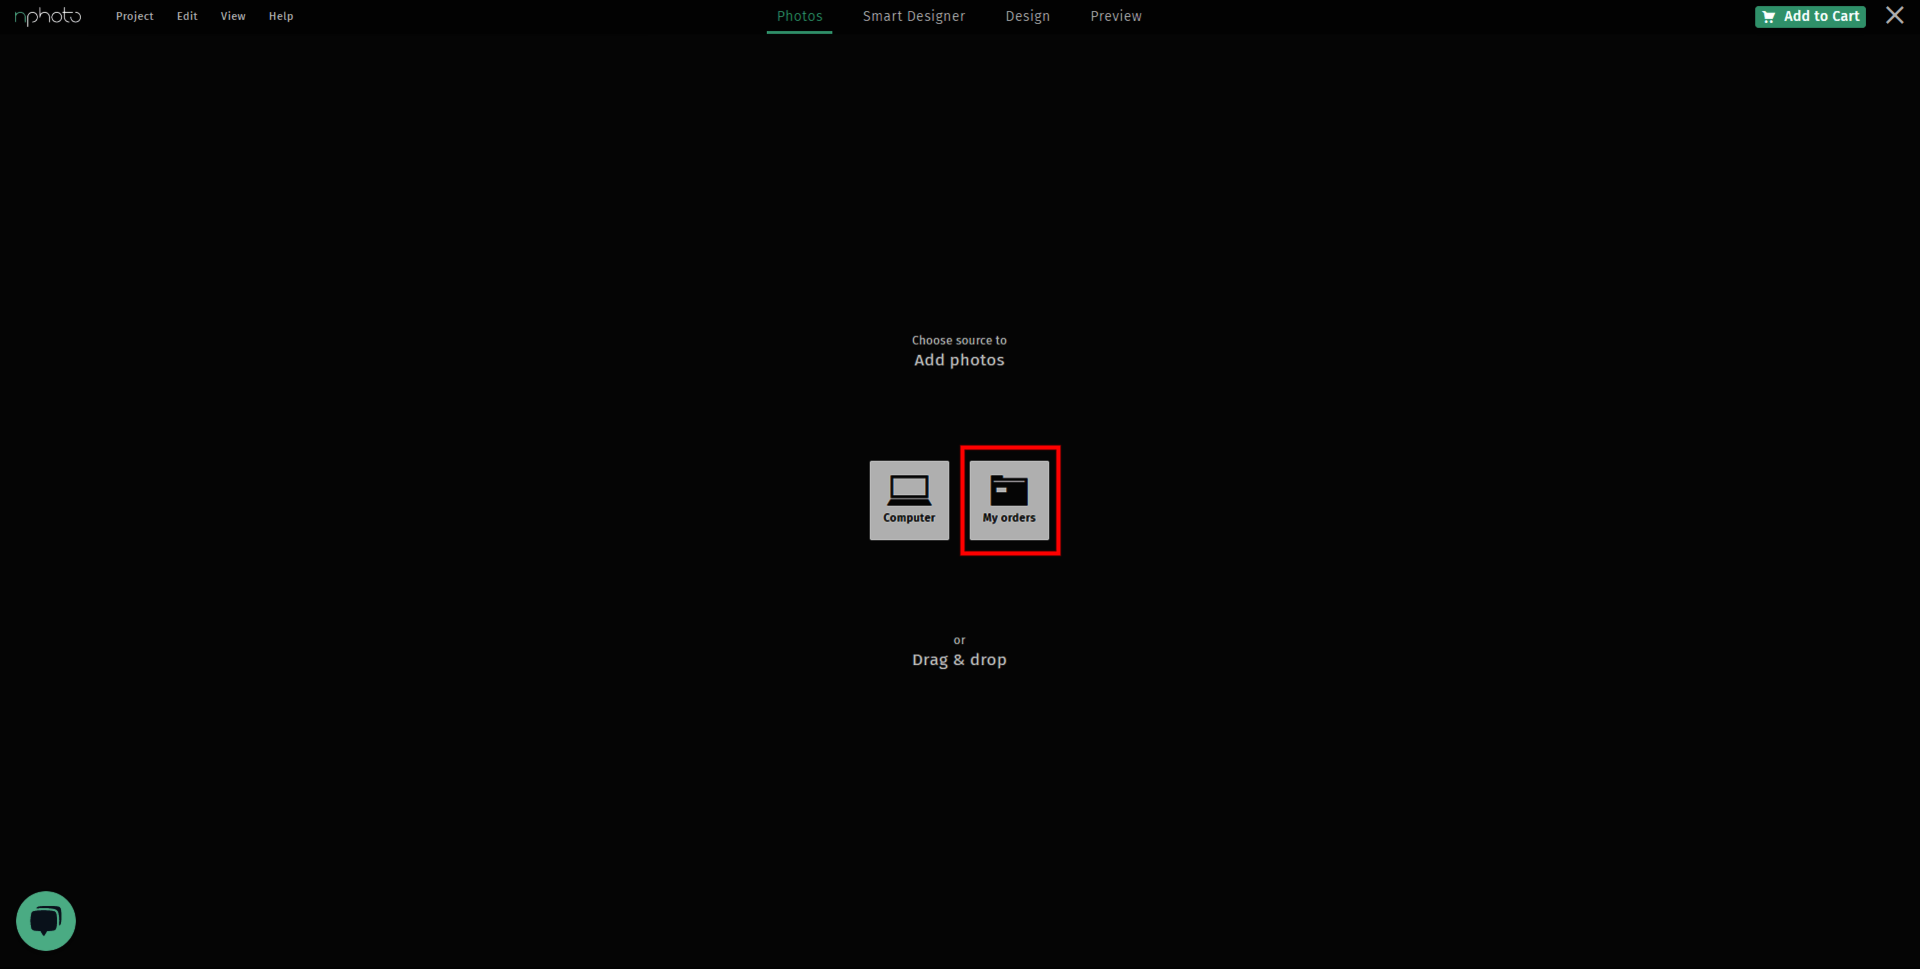
b) from previous orders you created in the editor.
c) drag and drop files into the online designer:

Remember that nDesigner Pro works on small low-res thumbnails of your photos, so while designing you may see a visual loss on quality, but do not worry, the final product will be exactly like your original files.
Tip: You can add more photographs to nDesigner Pro, at any time.
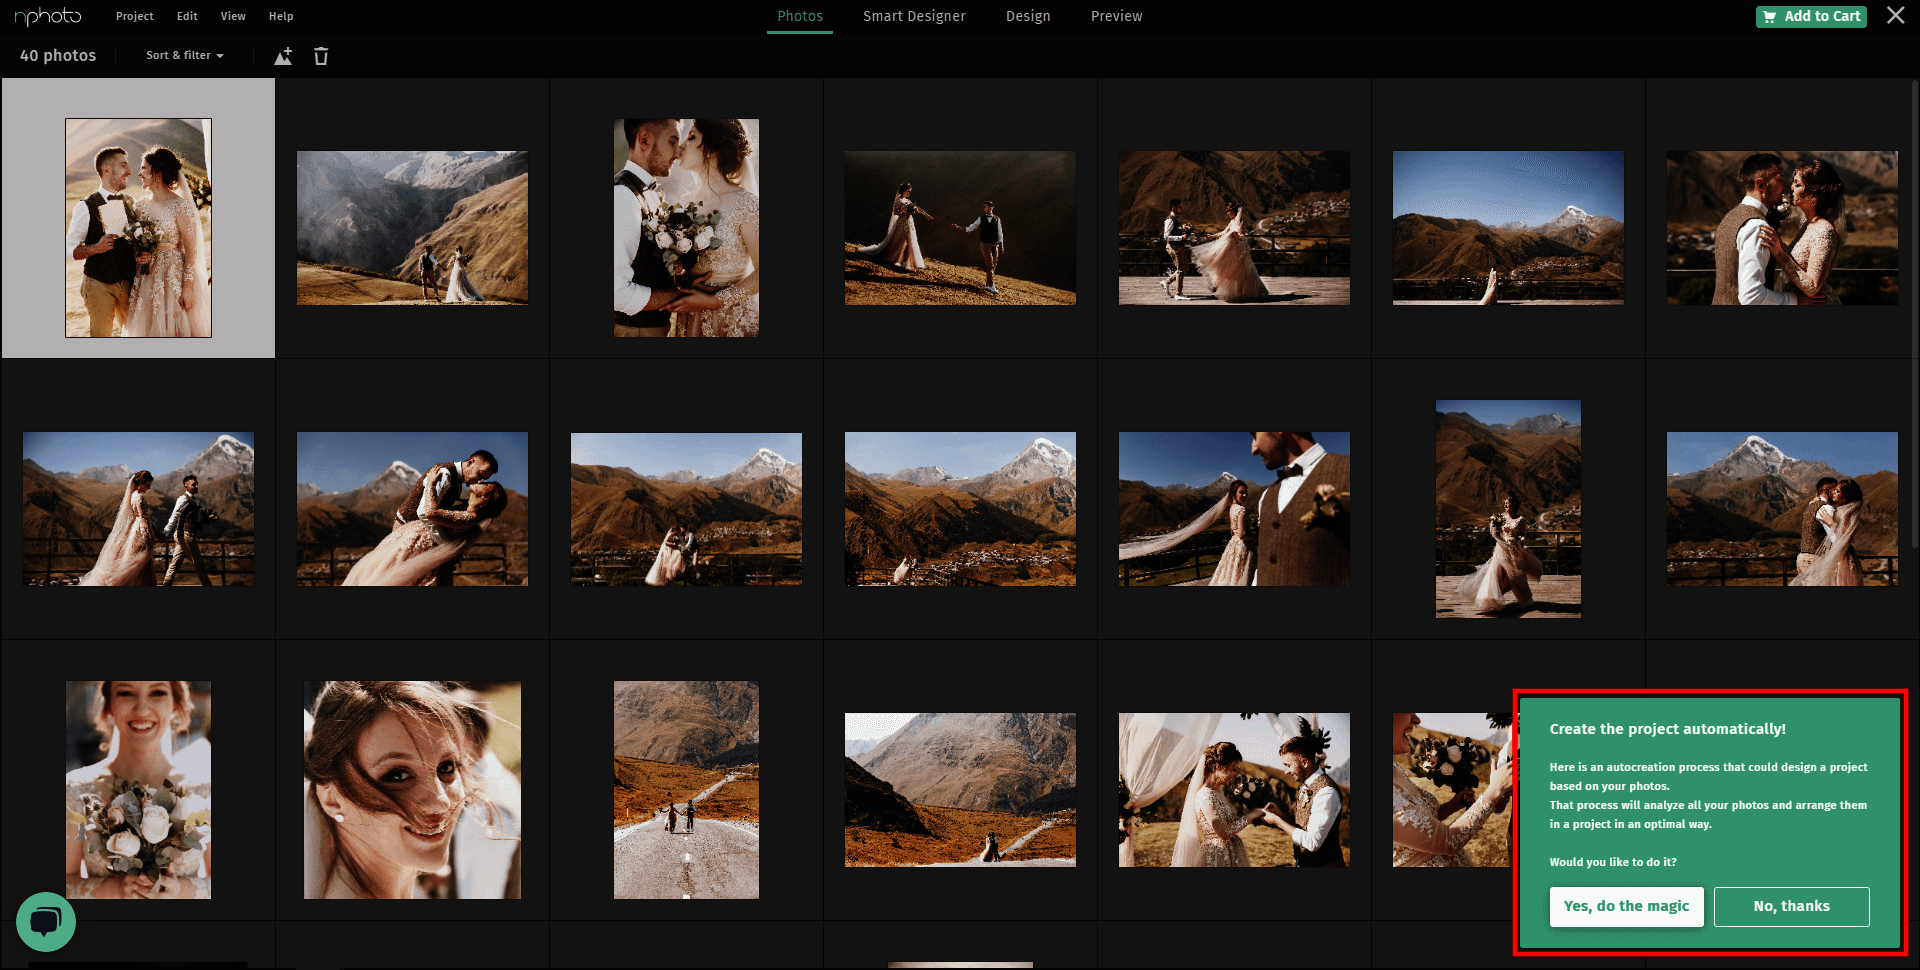
2. SMART DESIGNER (auto-creation)
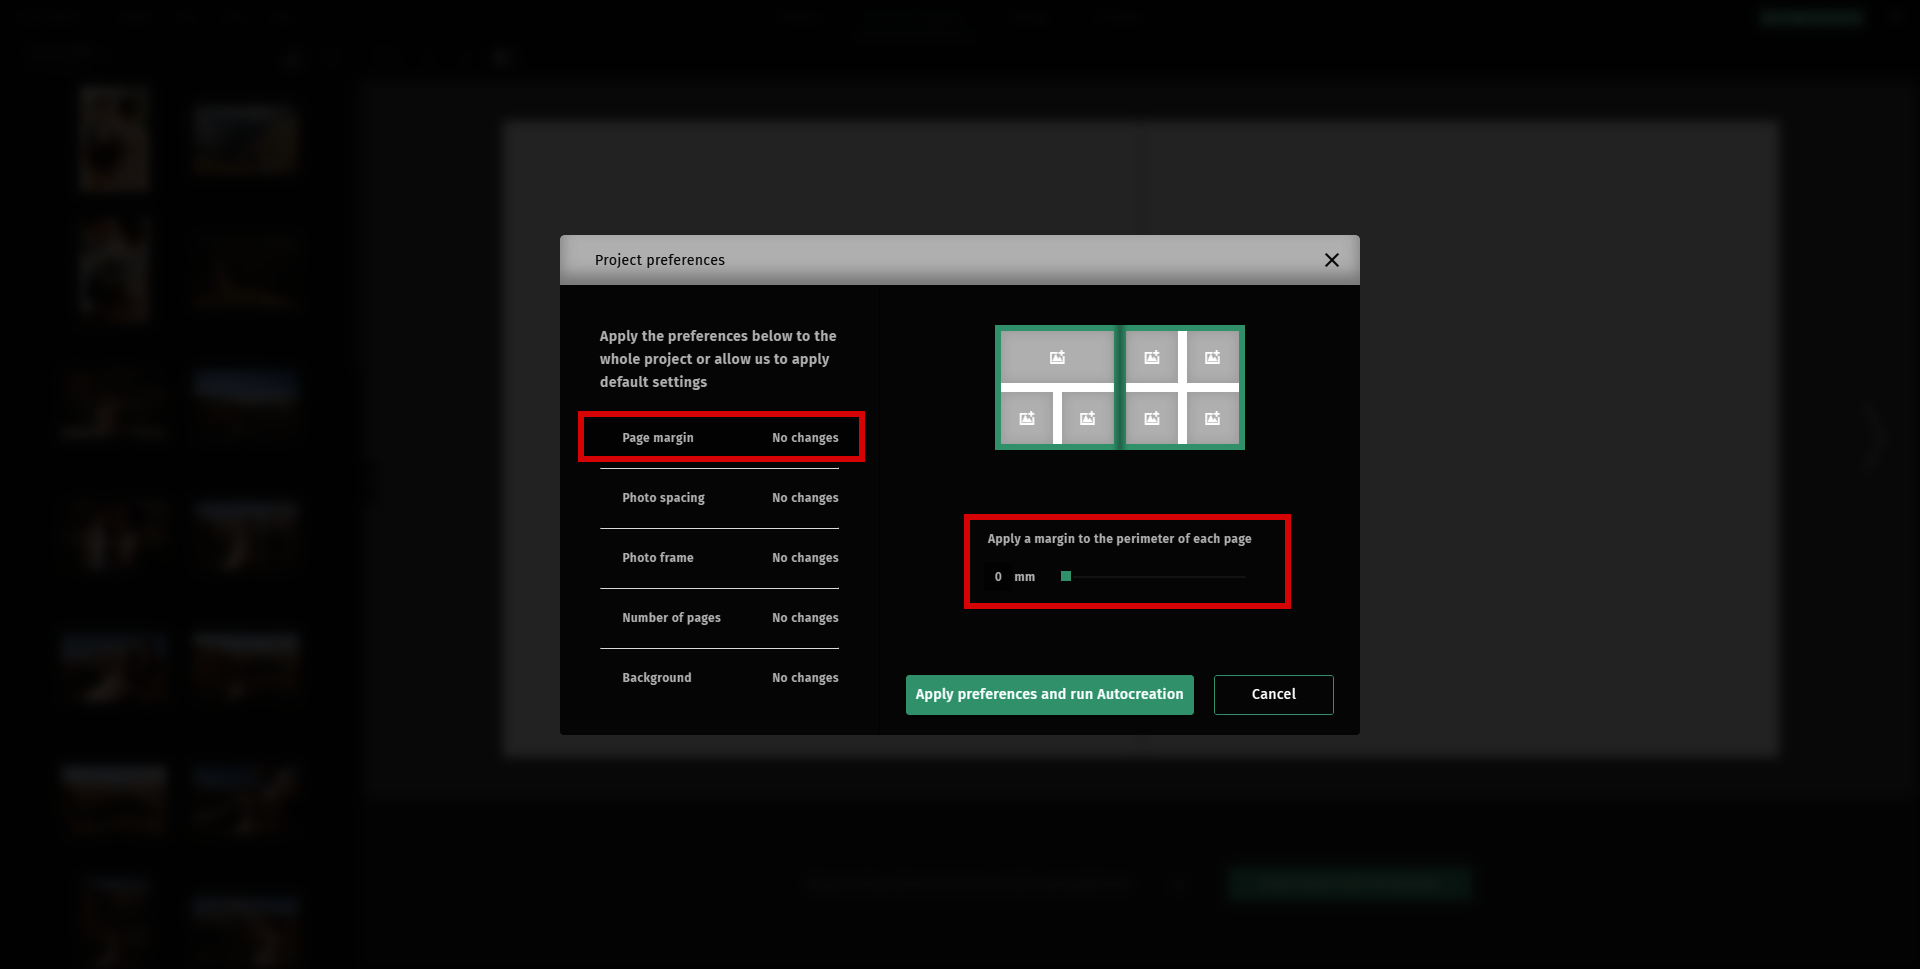
Create your project automatically. Before you continue with your design, you will be asked to select your project's preferences (image 3 & 4). These preferences allow you to apply the following elements to the whole project in just a few clicks:
1. page margin
2. spacing between photos
3. photo frame and it's colour
4. number of pages
5. font type, size, colour
6. background colour


3. PHOTO LAYOUTS
In Design mode, you can choose from our built-in templates with photo layouts ranging from 1 to 10 and even more images per page/spread.

4. SWAPPING PHOTOS
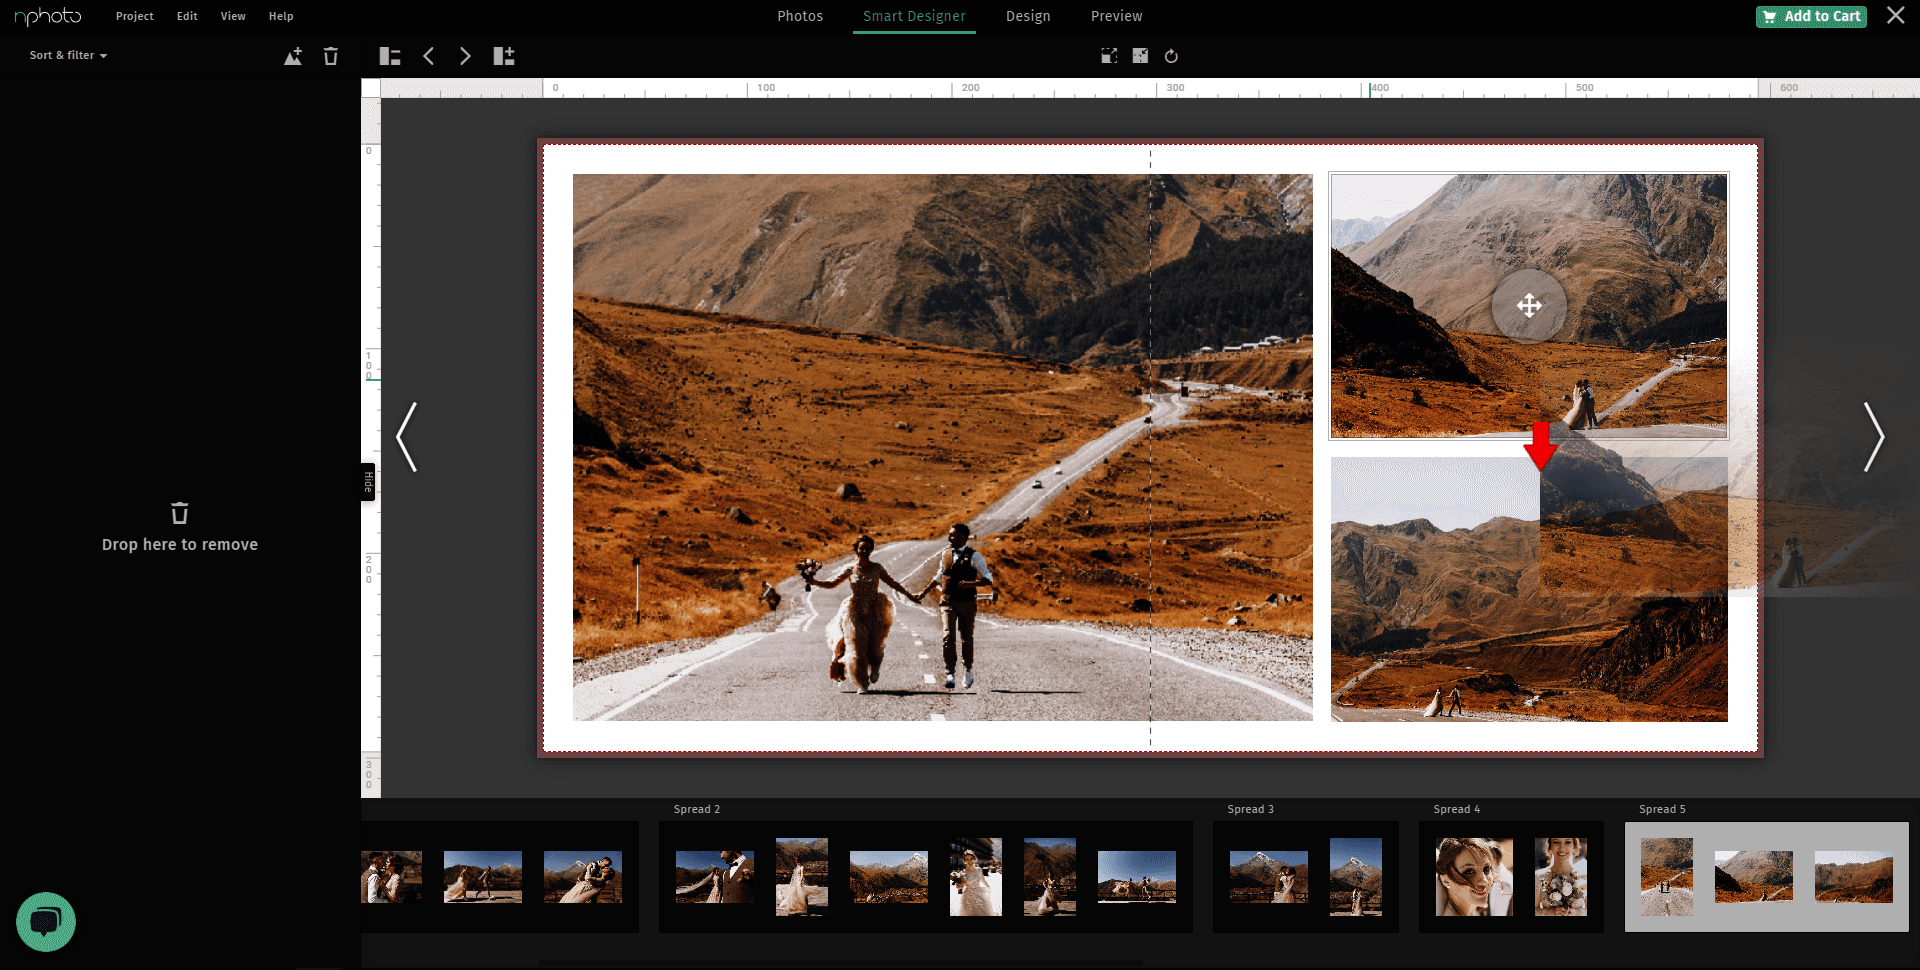
1. In Smart Designer mode: click the photo you want to swap and move it over to the new desired location, photos will swap place when you let go of the photo.
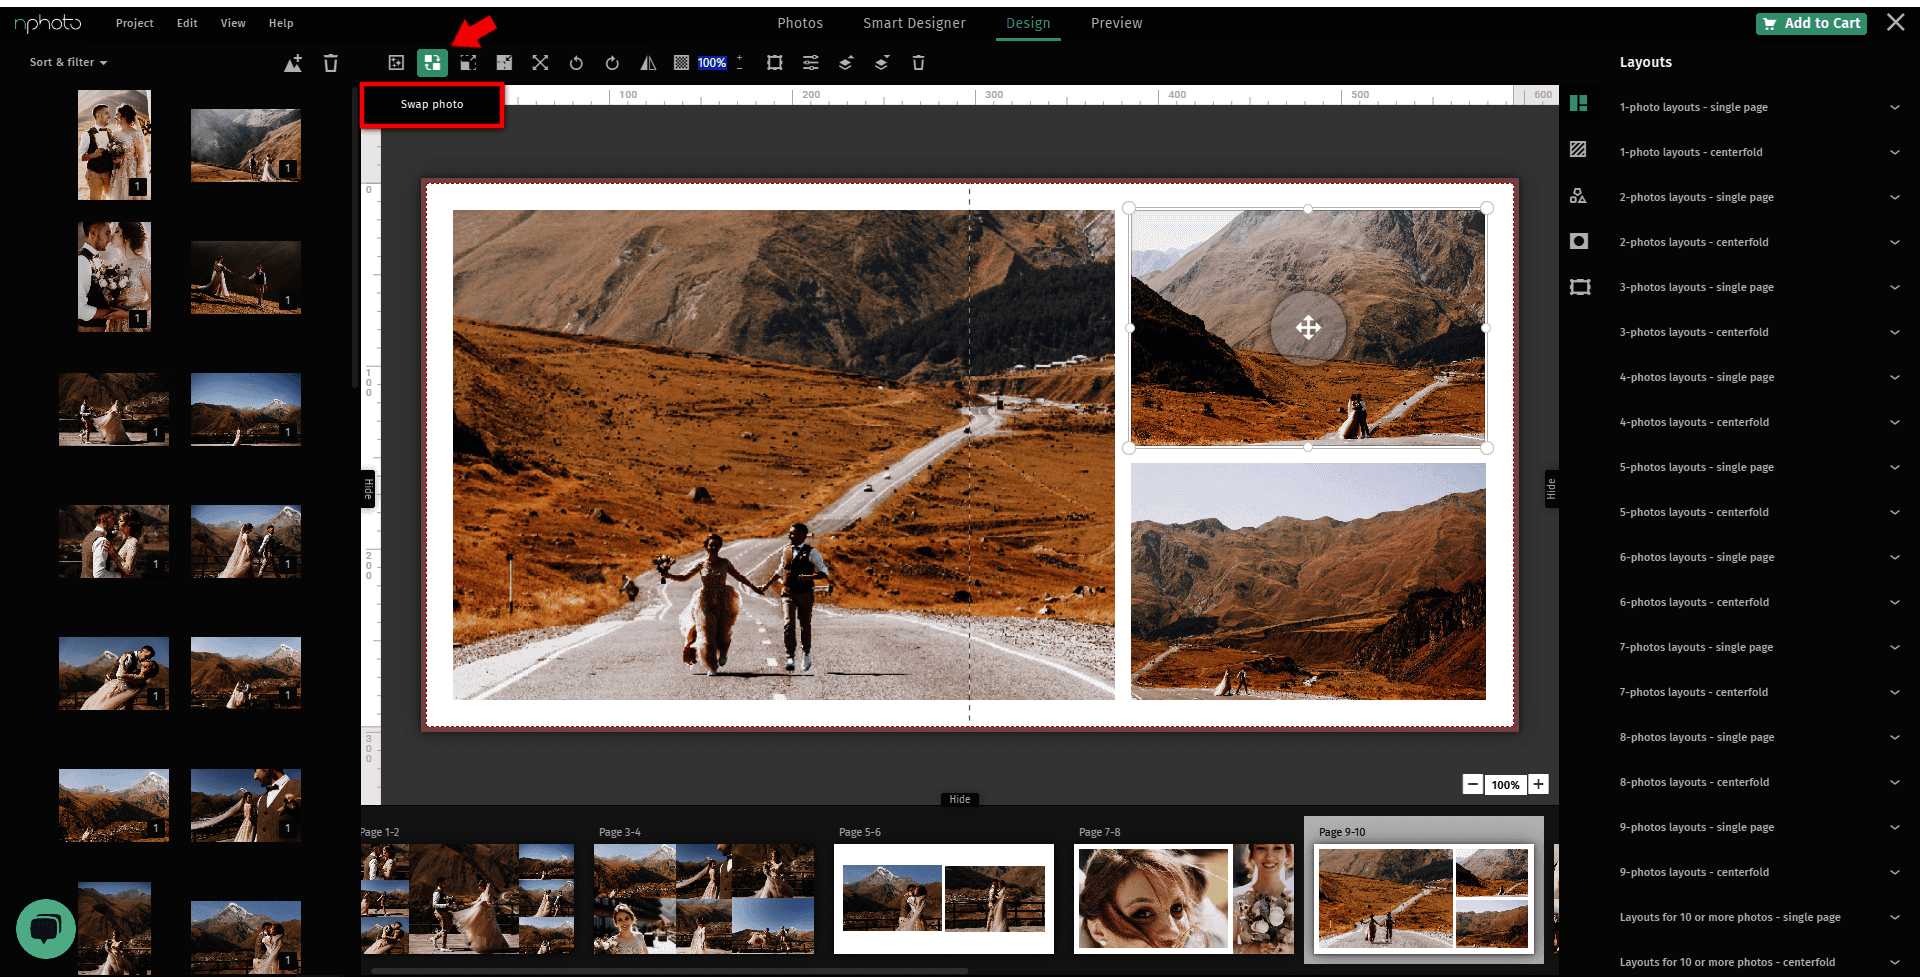
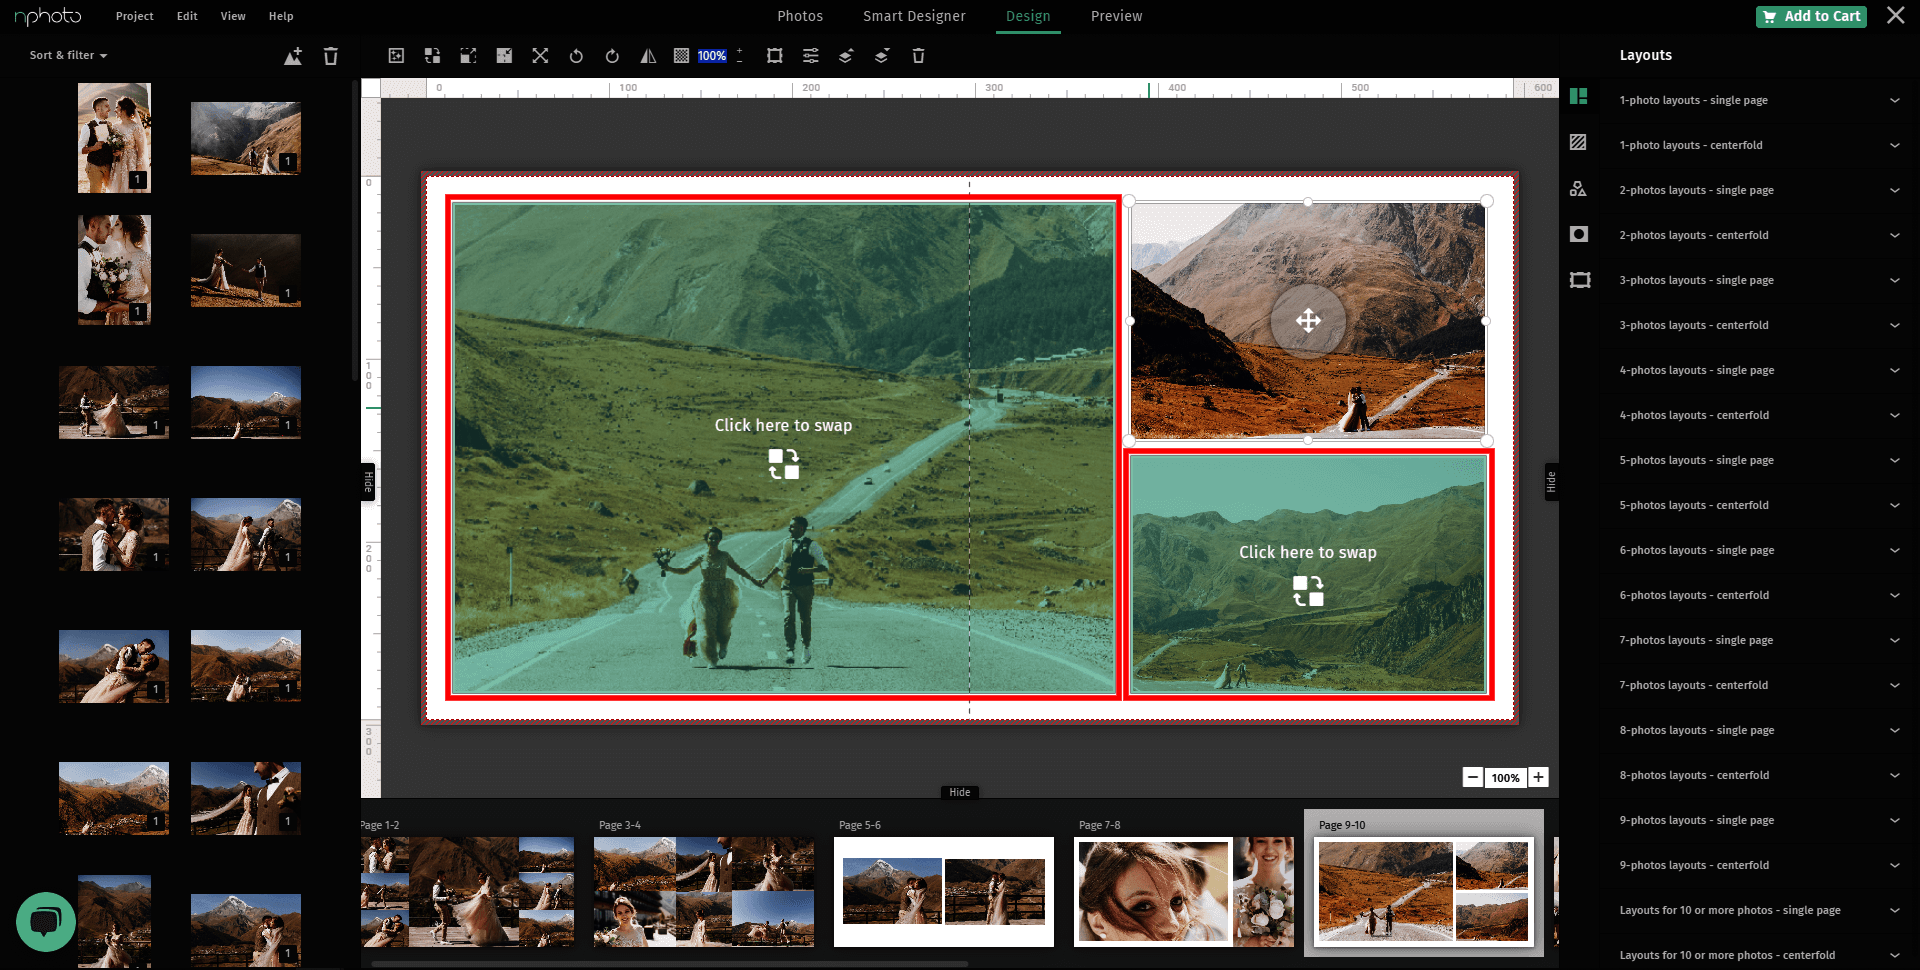
2. In Design mode: select the first photo, choose the “swap photo” icon and click the photo you want to swap with. The photos will swap place.
3. In Design mode, you can also select two photos by holding the Ctrl key (Cmd on Mac) and then clicking the ‘swap photo” icon for the images to swap places.
5. ADDING AND REMOVING PAGES/SPREADS
Smart Designer mode
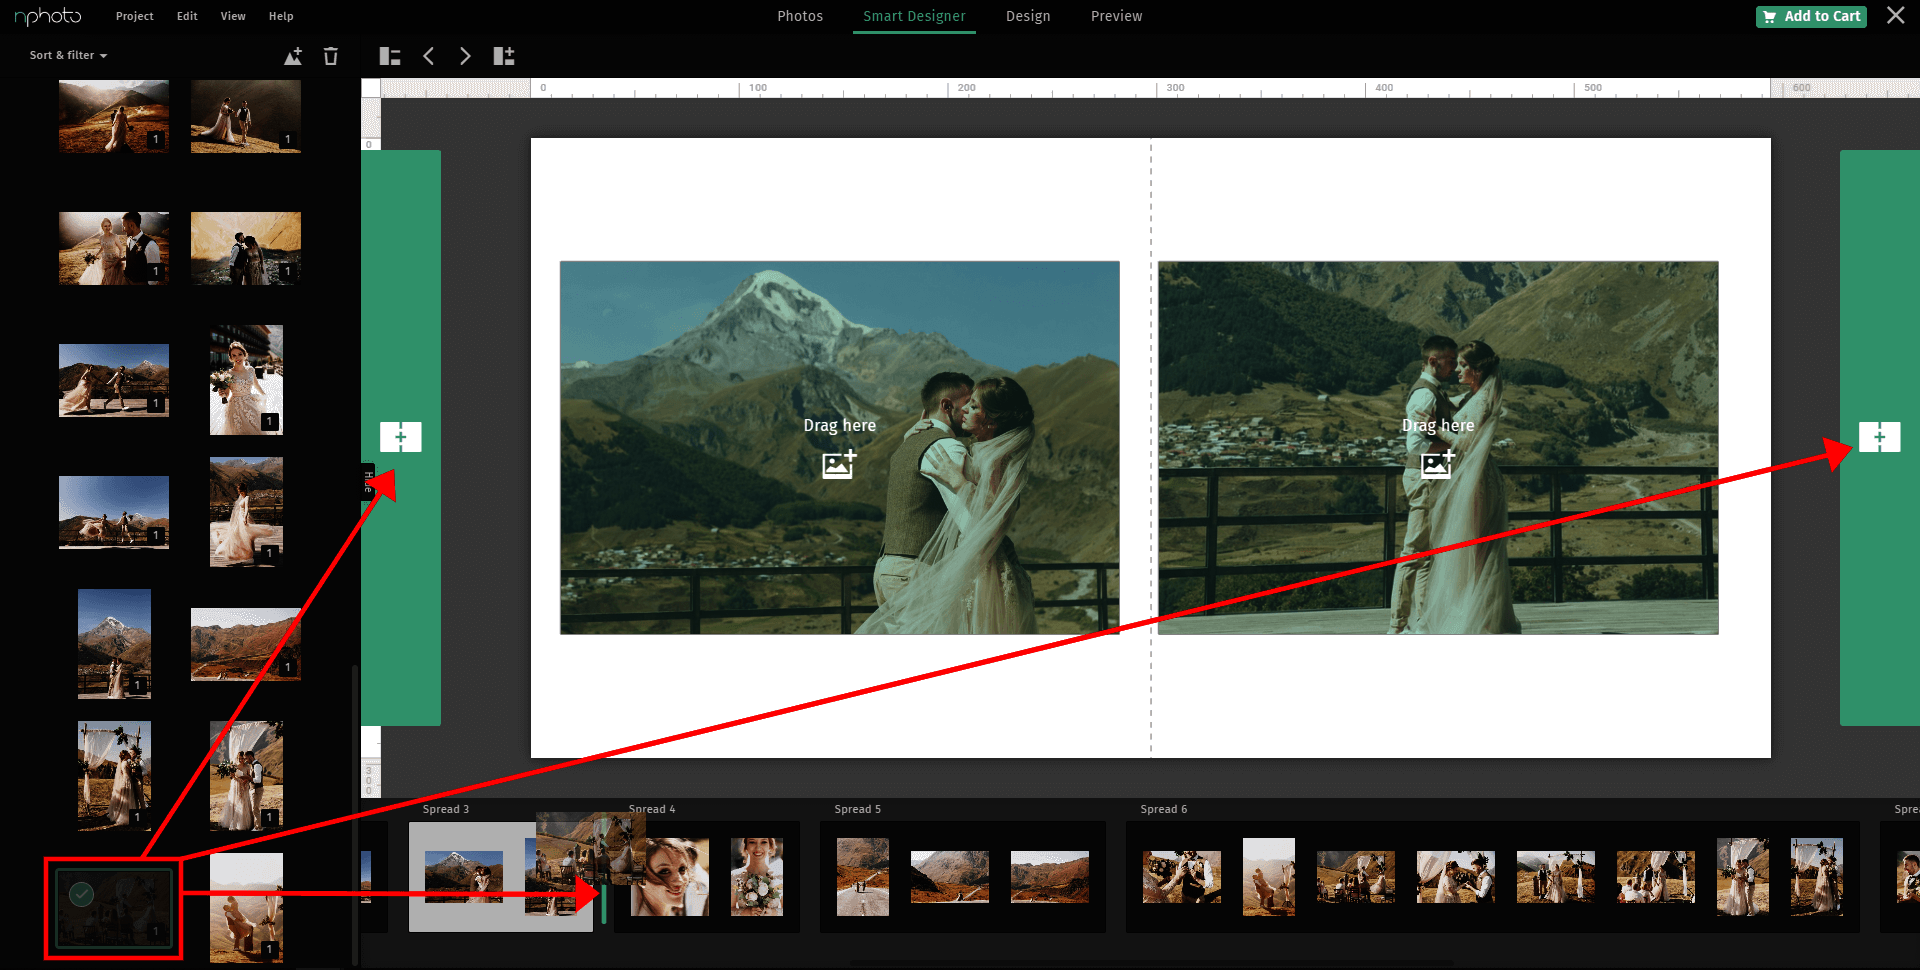
To add pages/spreads in Smart Designer mode simply select photos and drag & drop them onto the thumbnail panel.
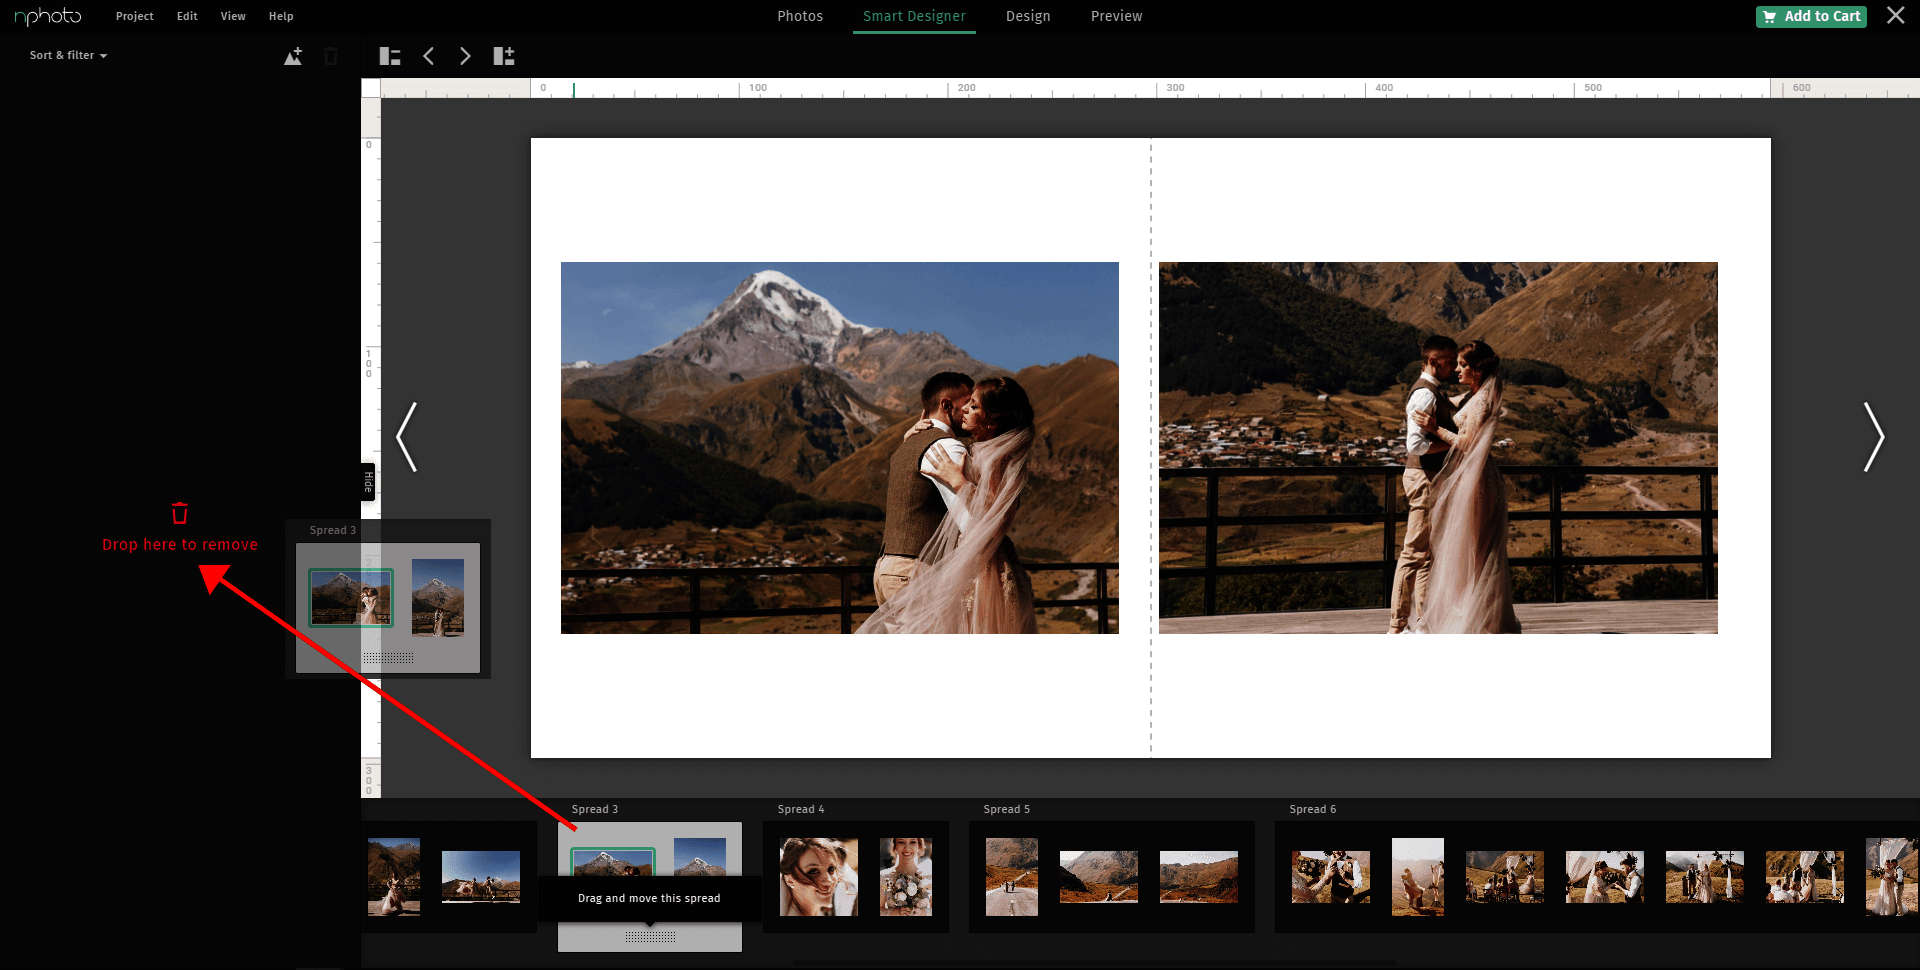
To remove pages/spreads in Smart Designer mode, grab the handle on thumbnail panel and move it to the left where you will see a red trashcan icon.
Design mode
Adding pages in Design mode is very simple. Just click add page/spread and another spread/page will appear right after your current spread.
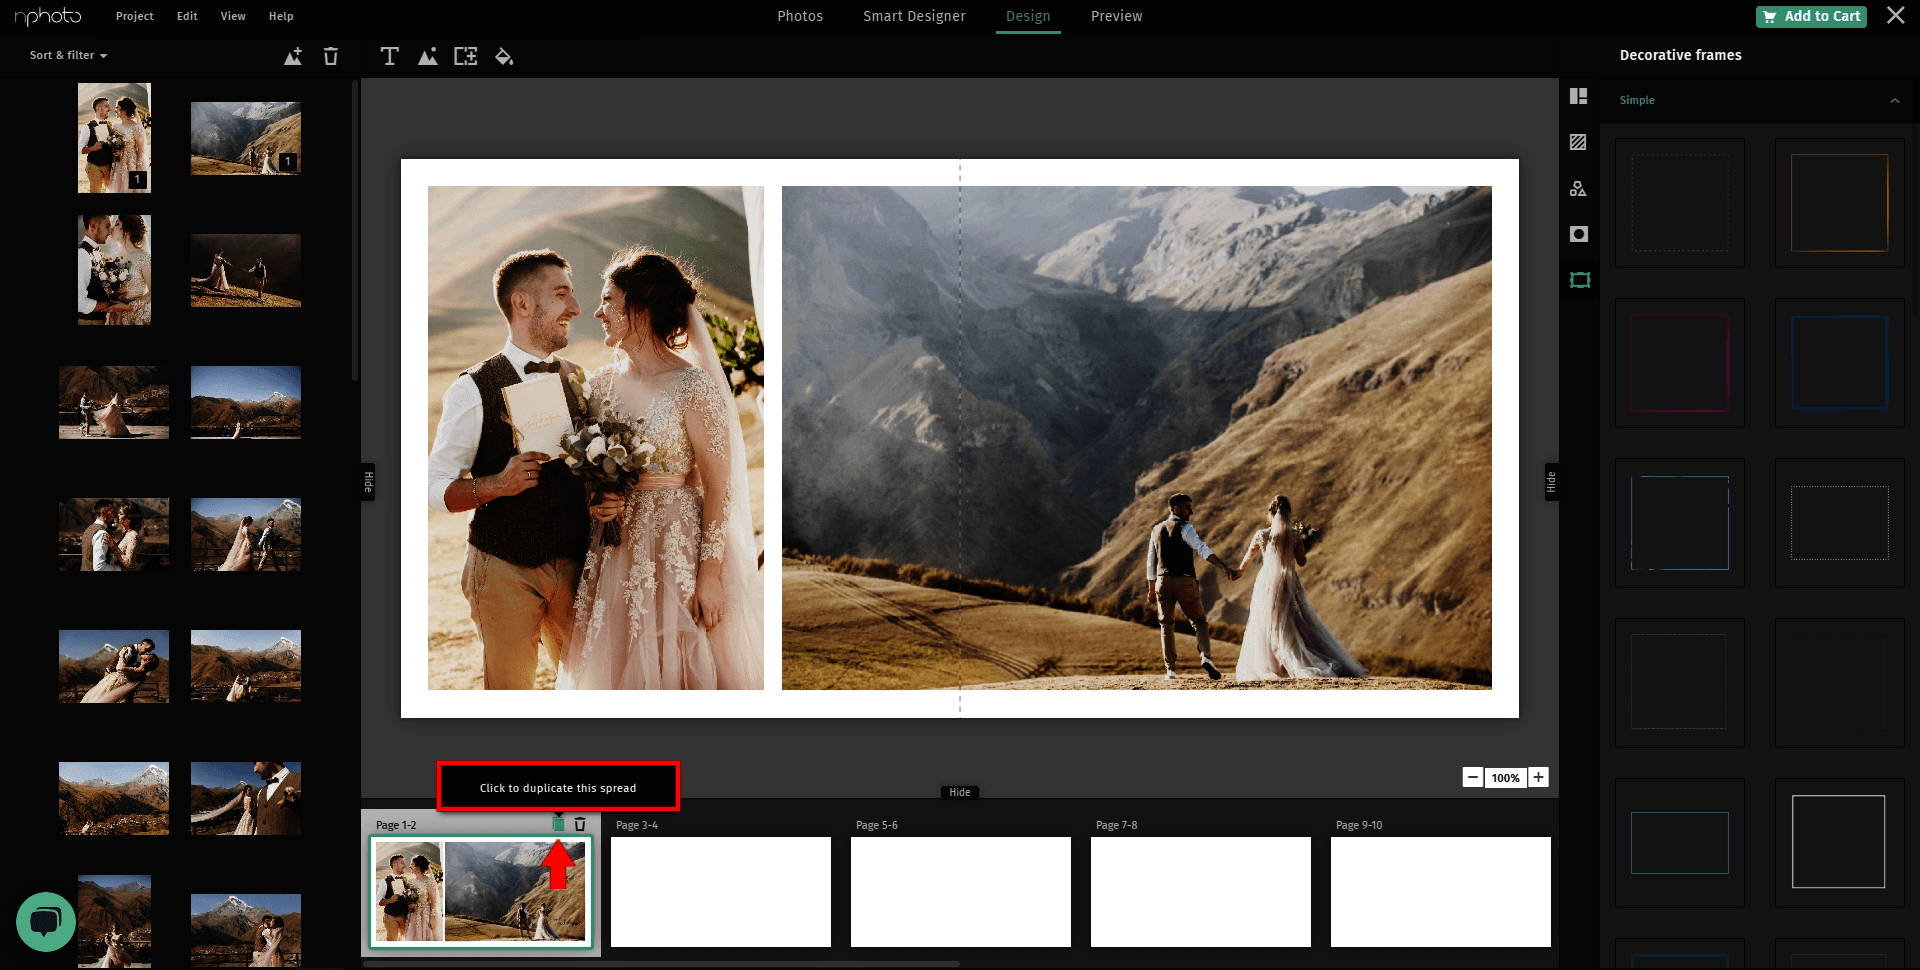
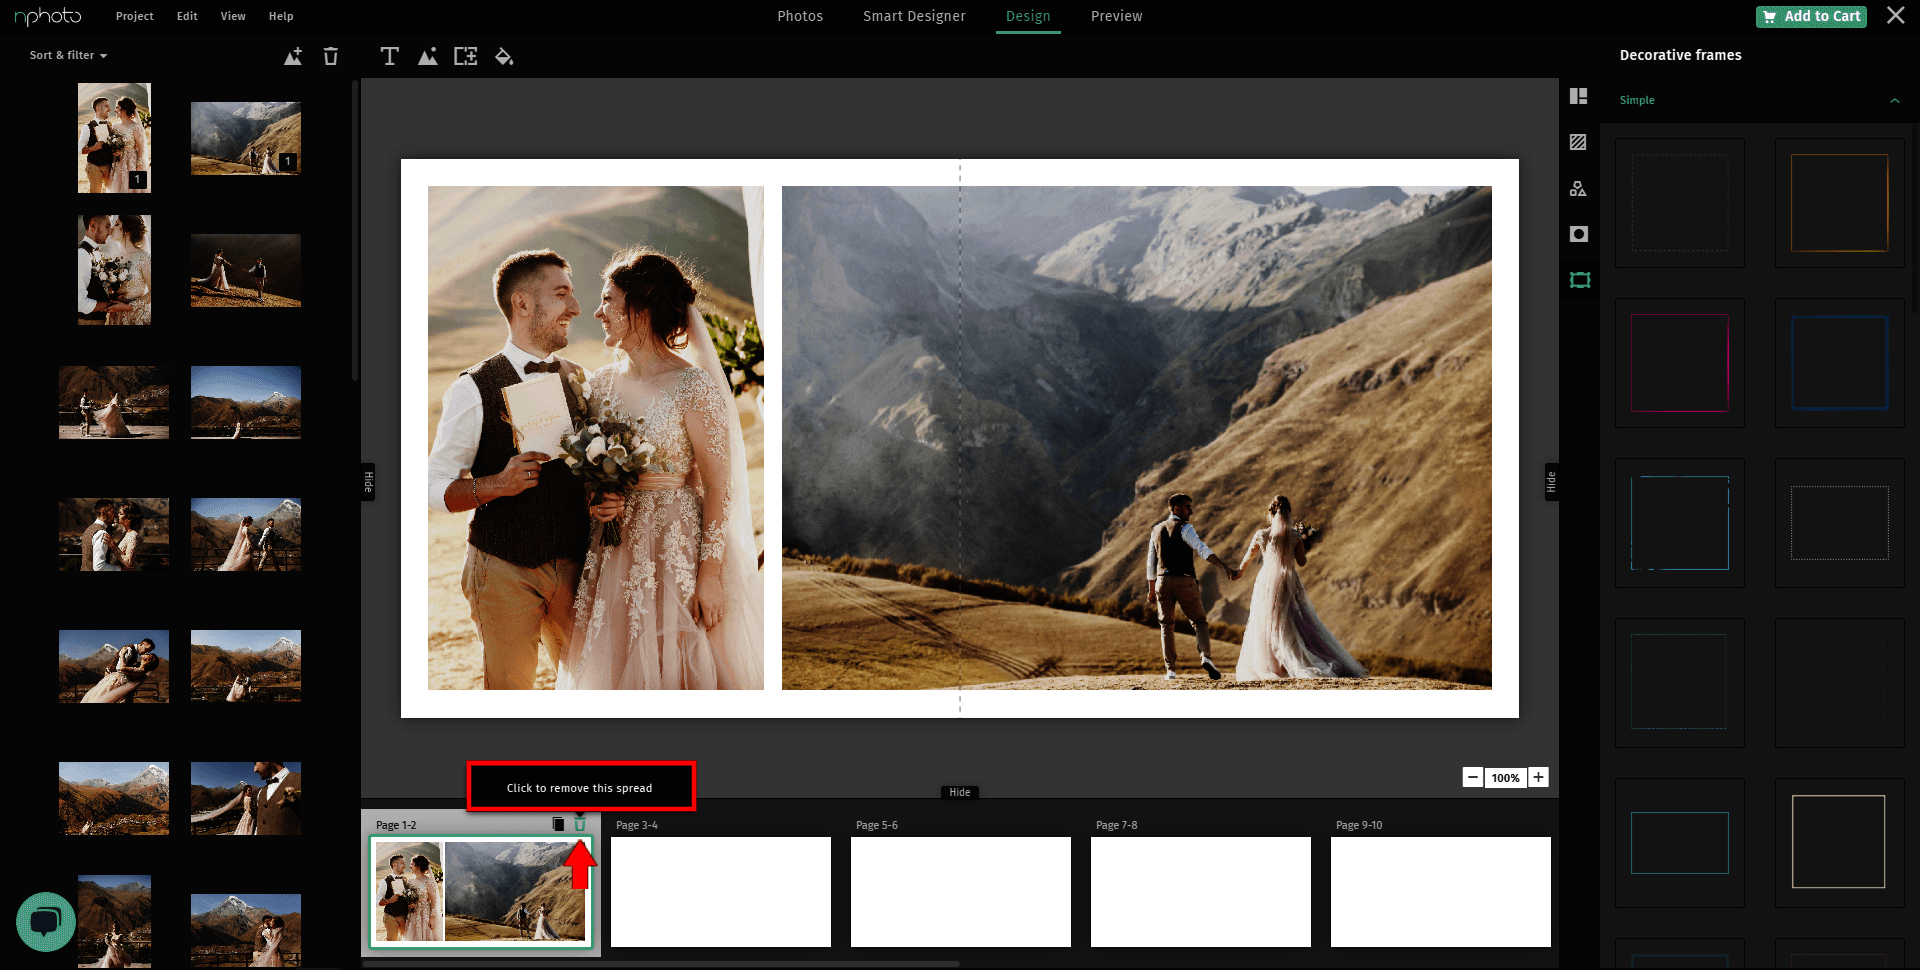
You can easily duplicate spread or delete it in Design mode just by clicking the appropriate icon in the thumbnail panel.
Tip: If you change the number of pages/spreads in your product and you want to add it to your cart, you will see a pop up saying “Order requires recalculation. Would you like
to do it now?” Selecting "Recalculate" will recalculate the price taking into account the additional pages/spreads that were added.
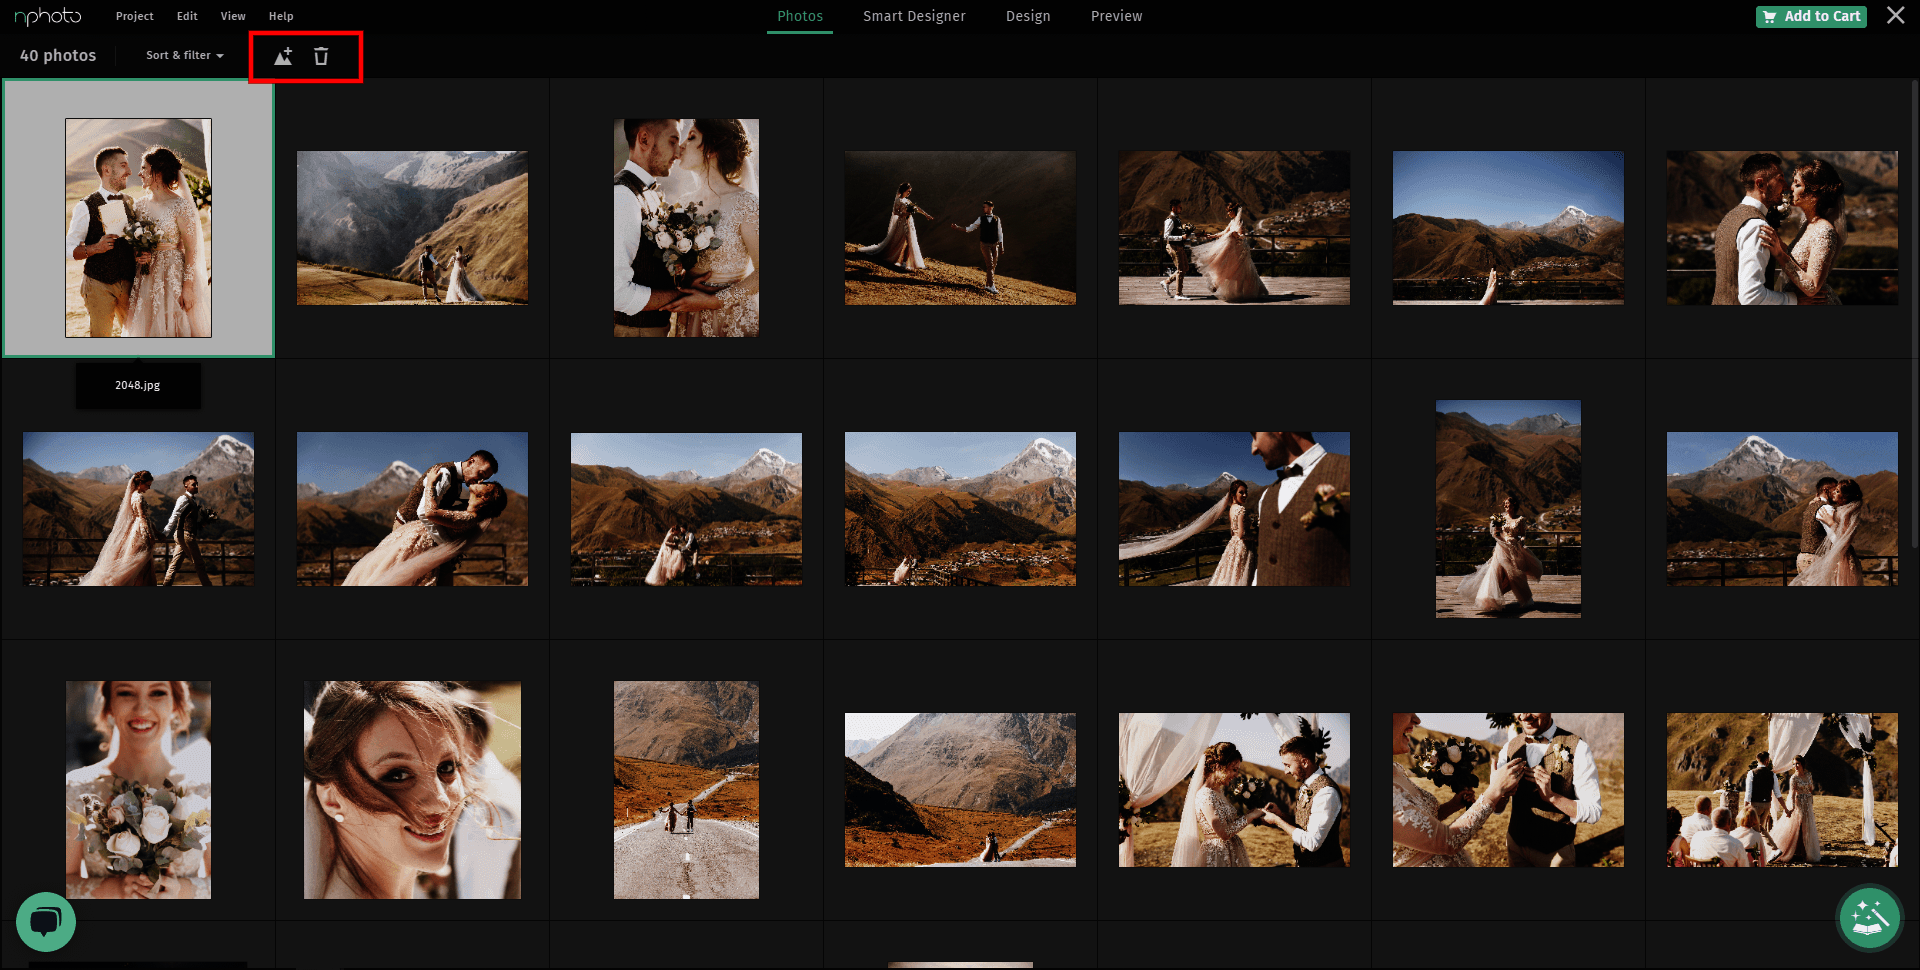
6. REMOVING PHOTOS
You can at any moment remove photos from your project or from nDesigner Pro completely.
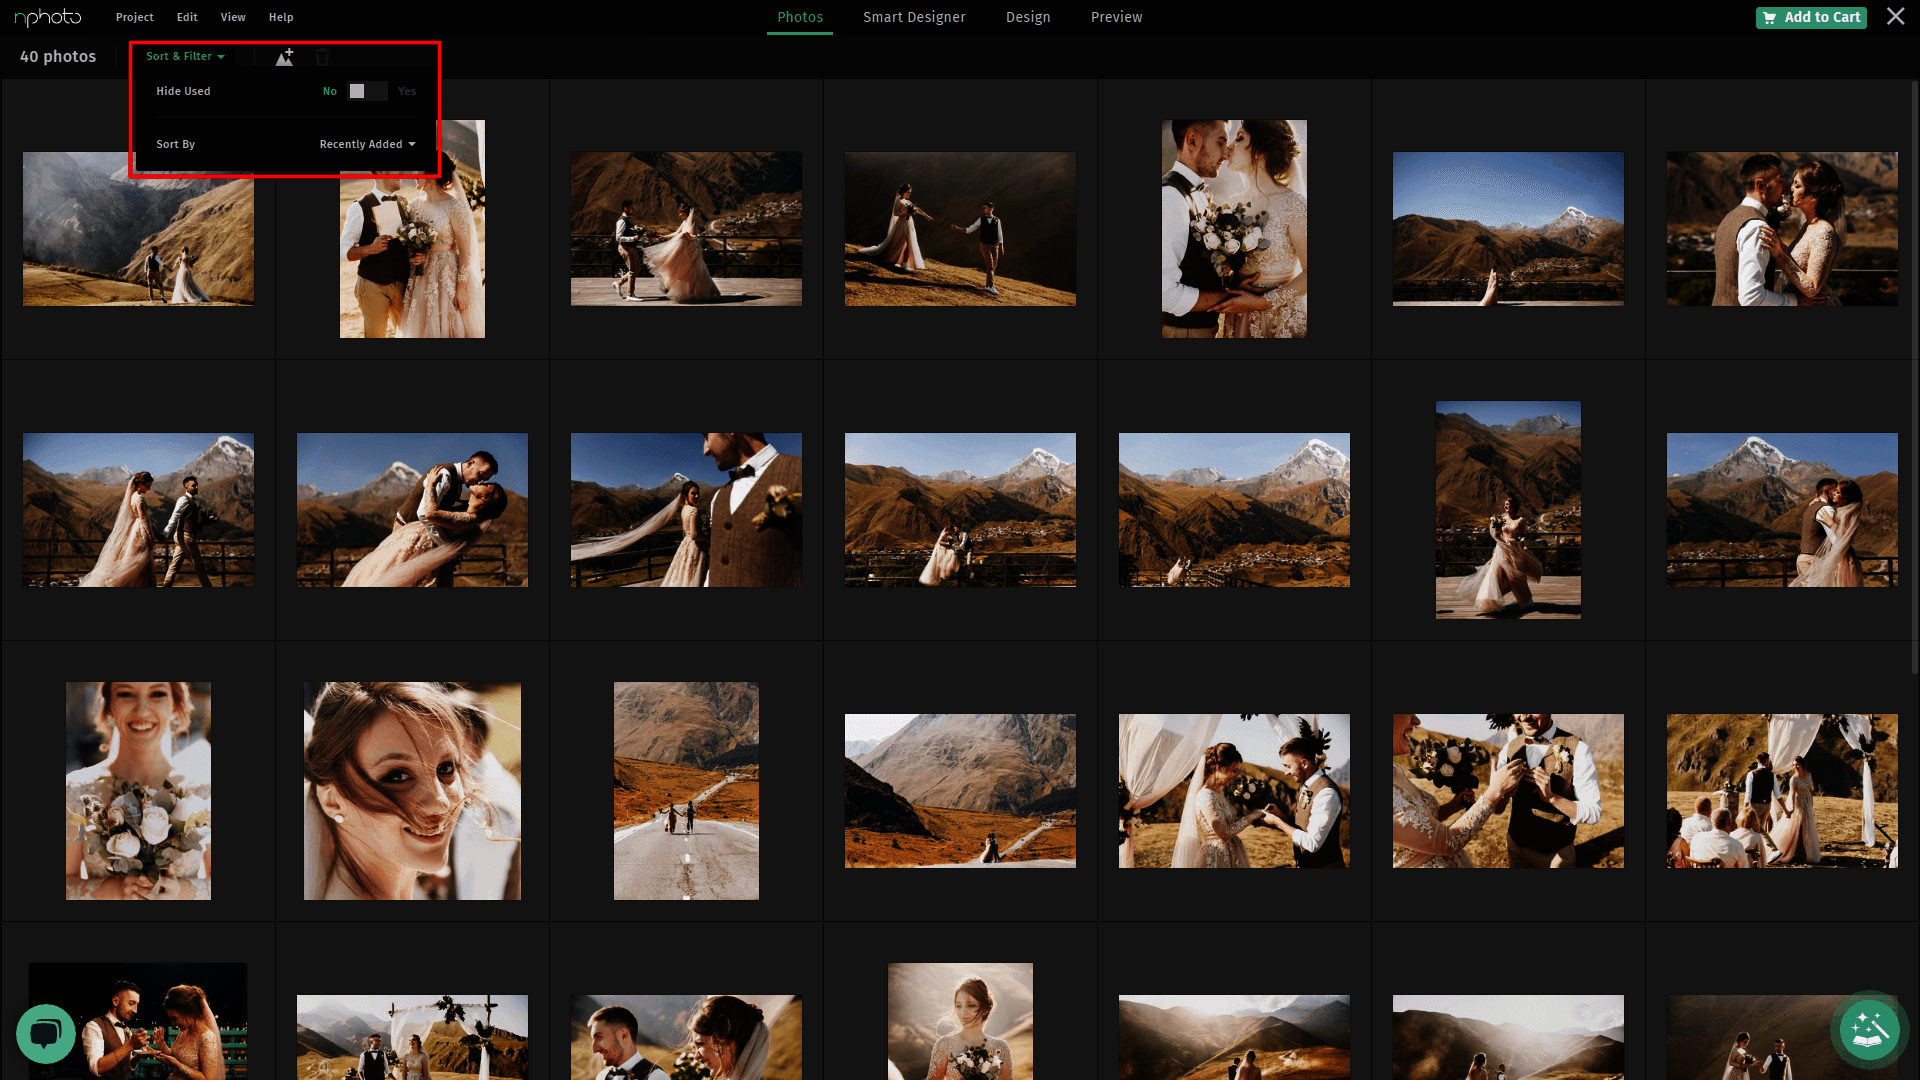
7. SORTING & HIDING PHOTOS
Select "Sort & filter" and move the slider to "Yes" or "No" to hide or show used photos. Sort your images by selecting the drop-down bar and select one of the available options.
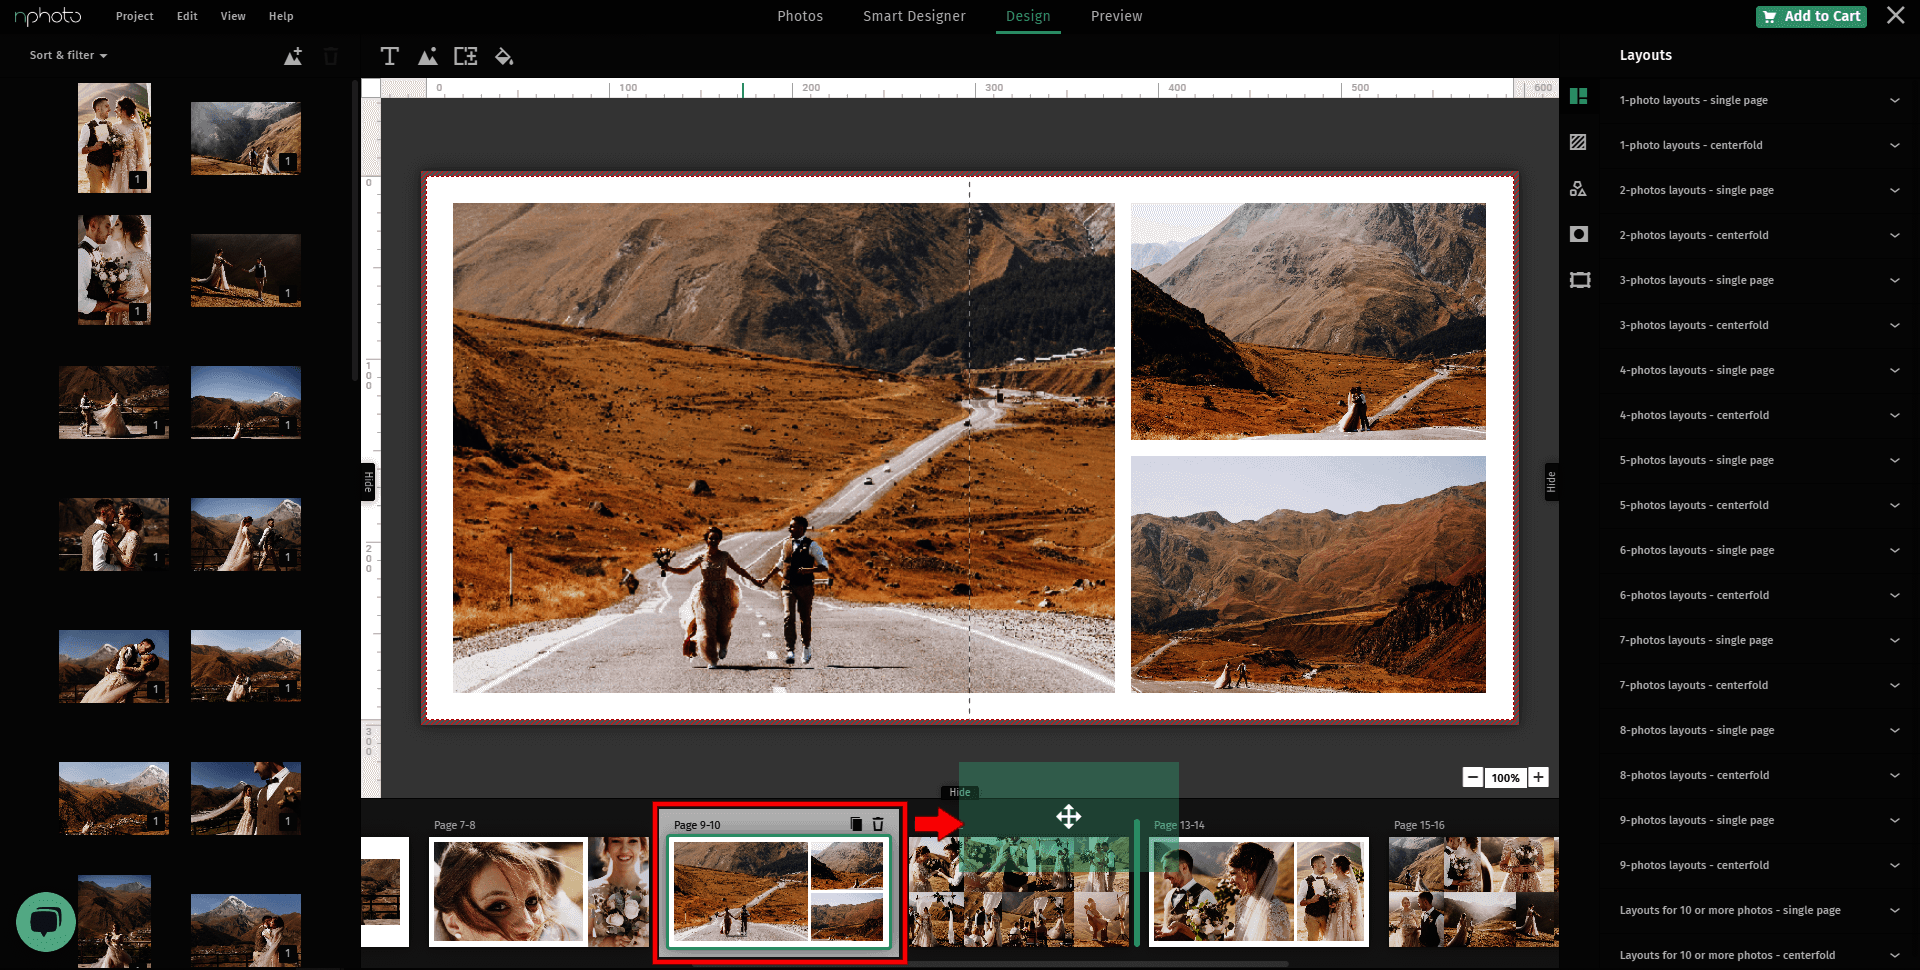
8. CHANGING THE ORDER OF PAGES/SPREADS
To change the order of your pages/spreads in both Design and Smart Designer mode simply drag page/spreads with the handle on thumbnail panel and drop it in the desired place. The vertical highlighted line will appear where the spread/page will be created.
9. SAFE AREA
From the View menu choose the “Show bleeds/over-fold” option, this will show you the safe area (inside the red border). The area outside of the border near the edge of the page/spread is the bleed/over-fold.

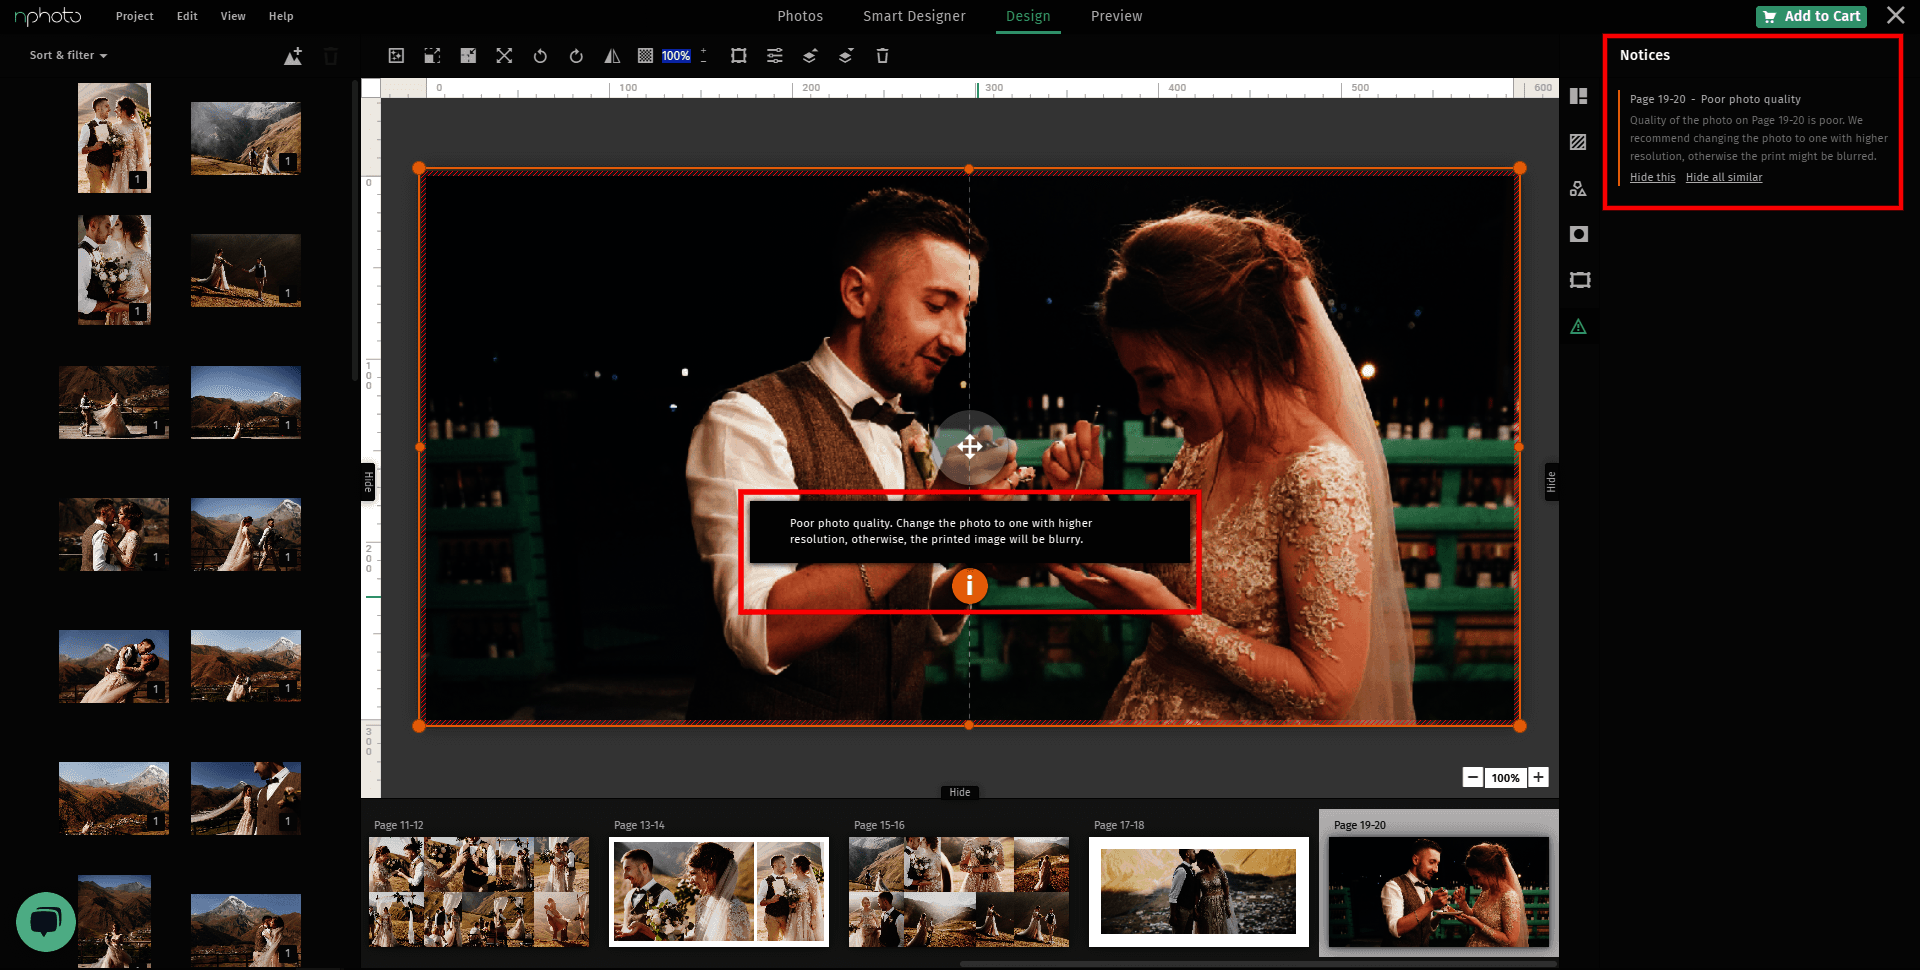
10. CHECK PROJECT
You can check if your project is correct and if there is anything you missed, at any time, just select Check Project from the Project menu.
The software will inform you about any problems like low-quality files, missing photos etc. The list of issues will be listed in the Notices panel. If the issue is caused by low-quality files you may get two types of messages: bad photo quality (yellow exclamation mark) - the photo differs from others and maybe slightly blurred, very bad photo quality (red exclamation mark) - we suggest that you not use such photos in your design. You can try and resize them, to make them smaller.
Tip: Each issue is directly linked to take you to the page or spread it is on so you can fix it right away.


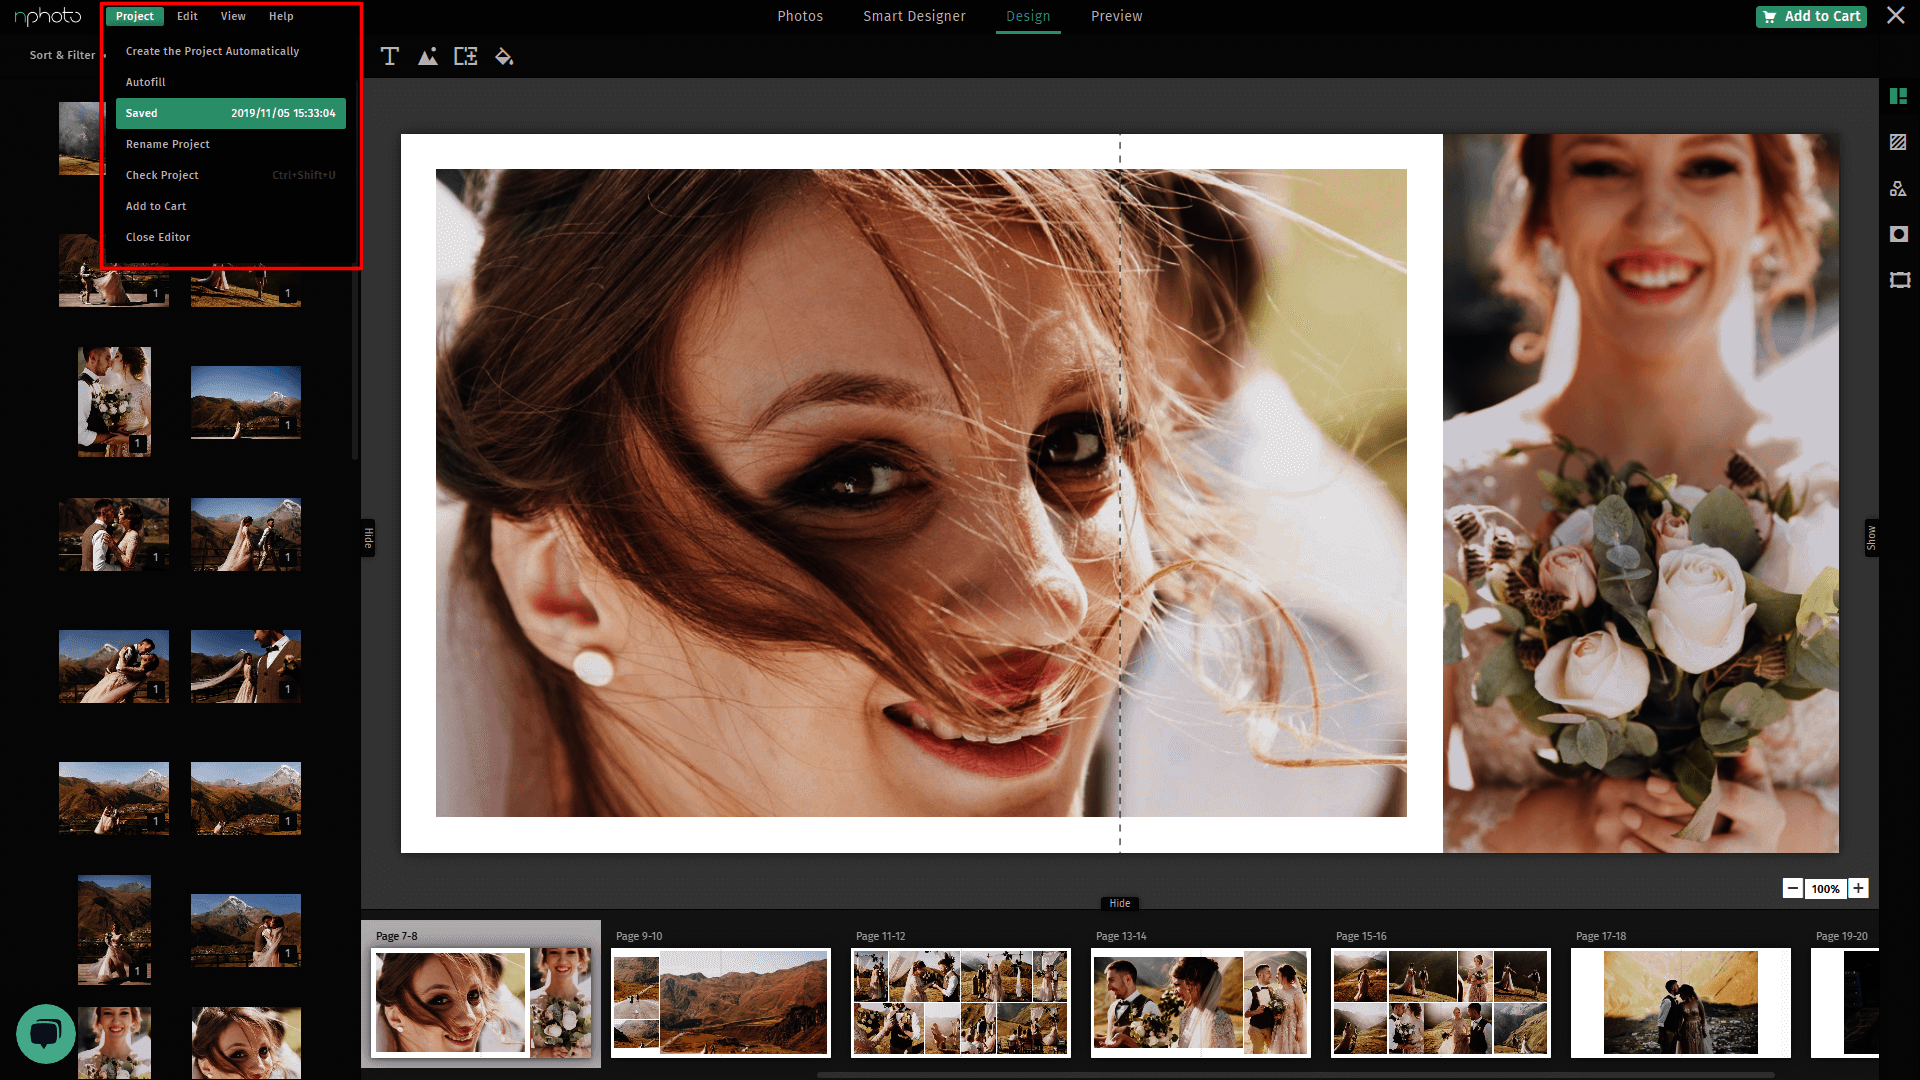
11. SAVE PROJECT
Save your project at any moment and go back to it when you need to. The project can be accessed from your basket at any time. To save your project go to the Project menu and click Save.
Tip: nDesigner Pro has an autosave feature that automatically saves your project every 5 minutes when you are working on your design.
12. EDIT PROJECT
You can edit your project at any time. Access your project from the cart to edit it.

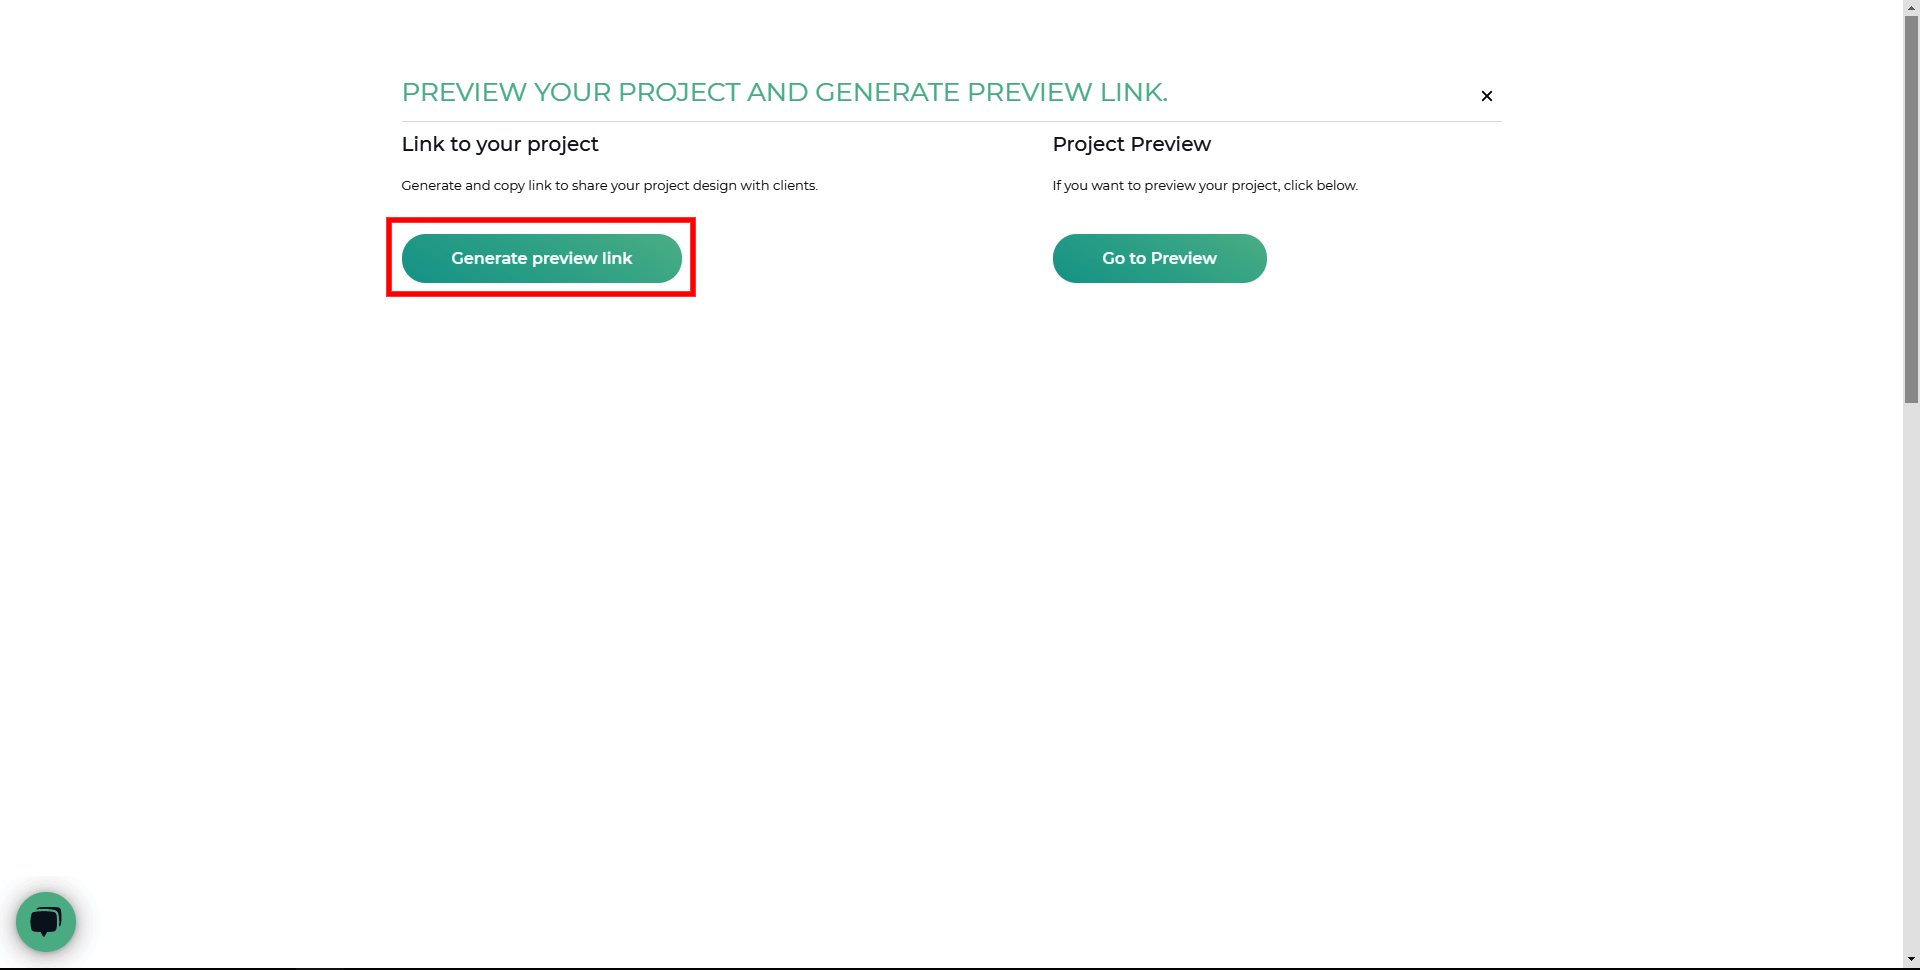
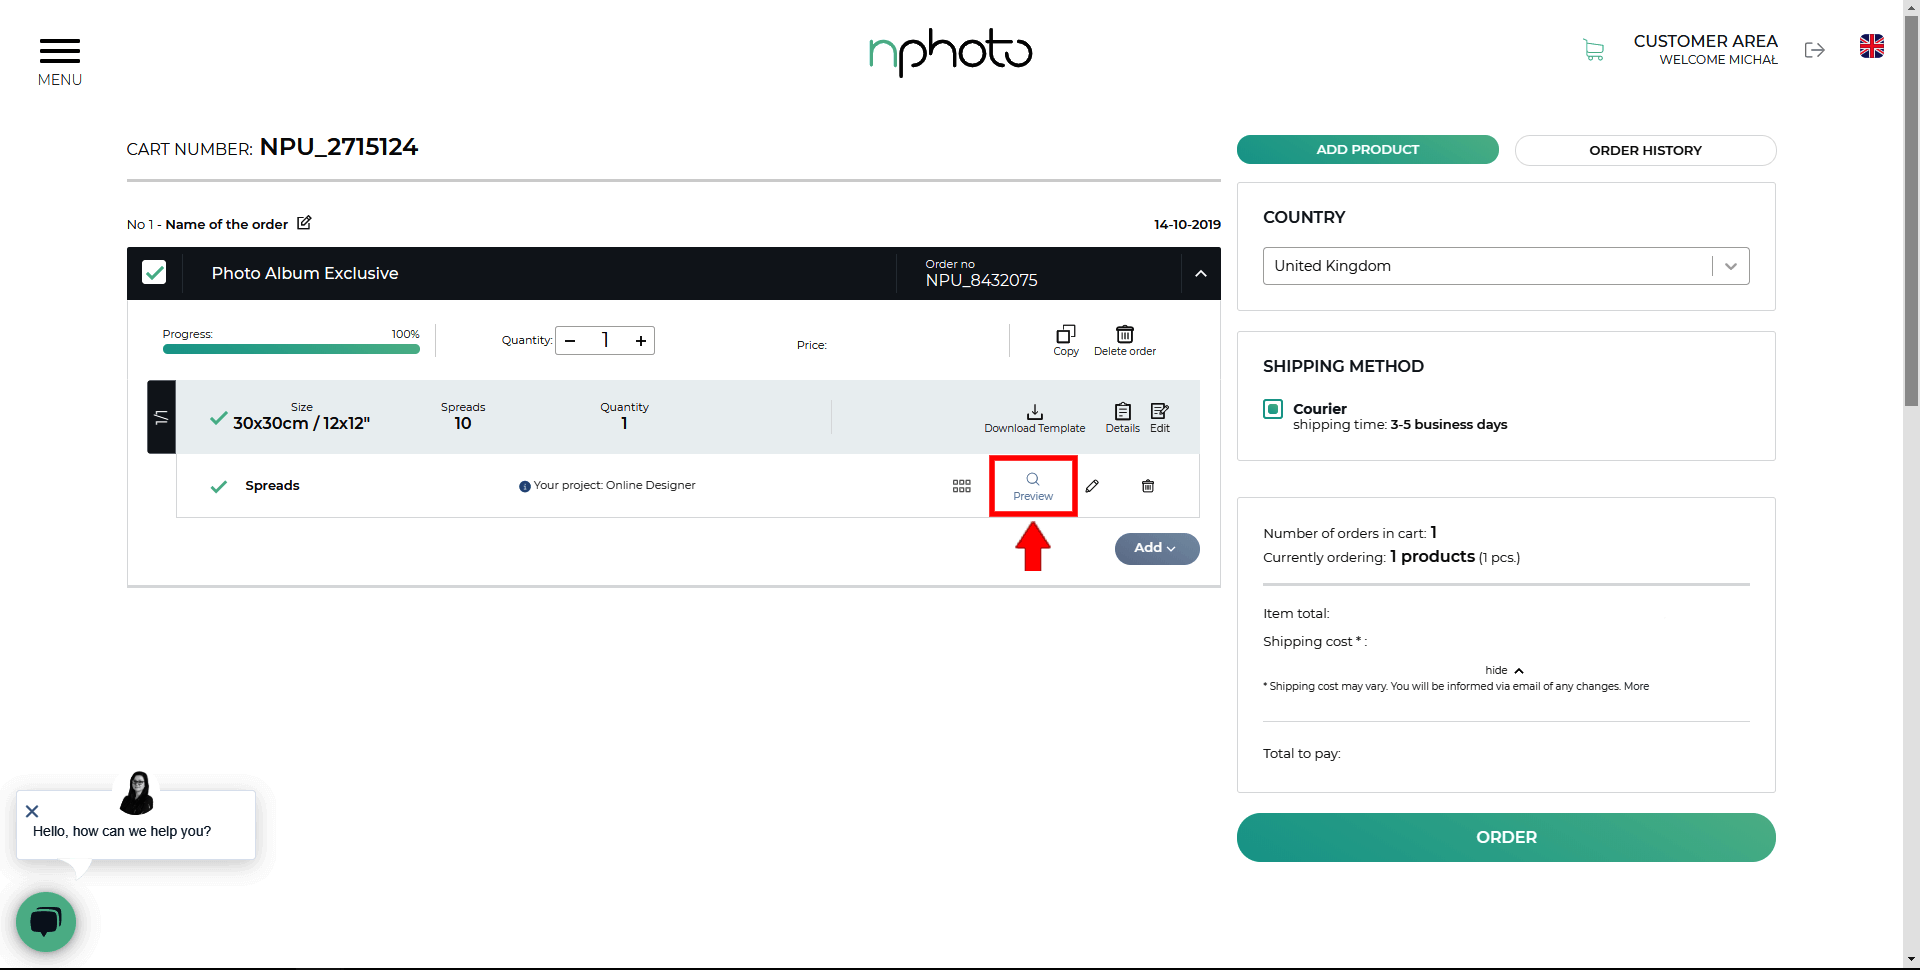
13. CUSTOMER PREVIEW
Generate a preview link to send to your clients so they can preview the design. This option can be found in your basket just click the magnifying glass, Preview button, and you will see two options. Generate a preview link to your
project to send to clients or simply Preview your project yourself.
14. BOTTOM PANEL SMART DESIGNER
There you can find many useful features that allow you to quickly edit your project.
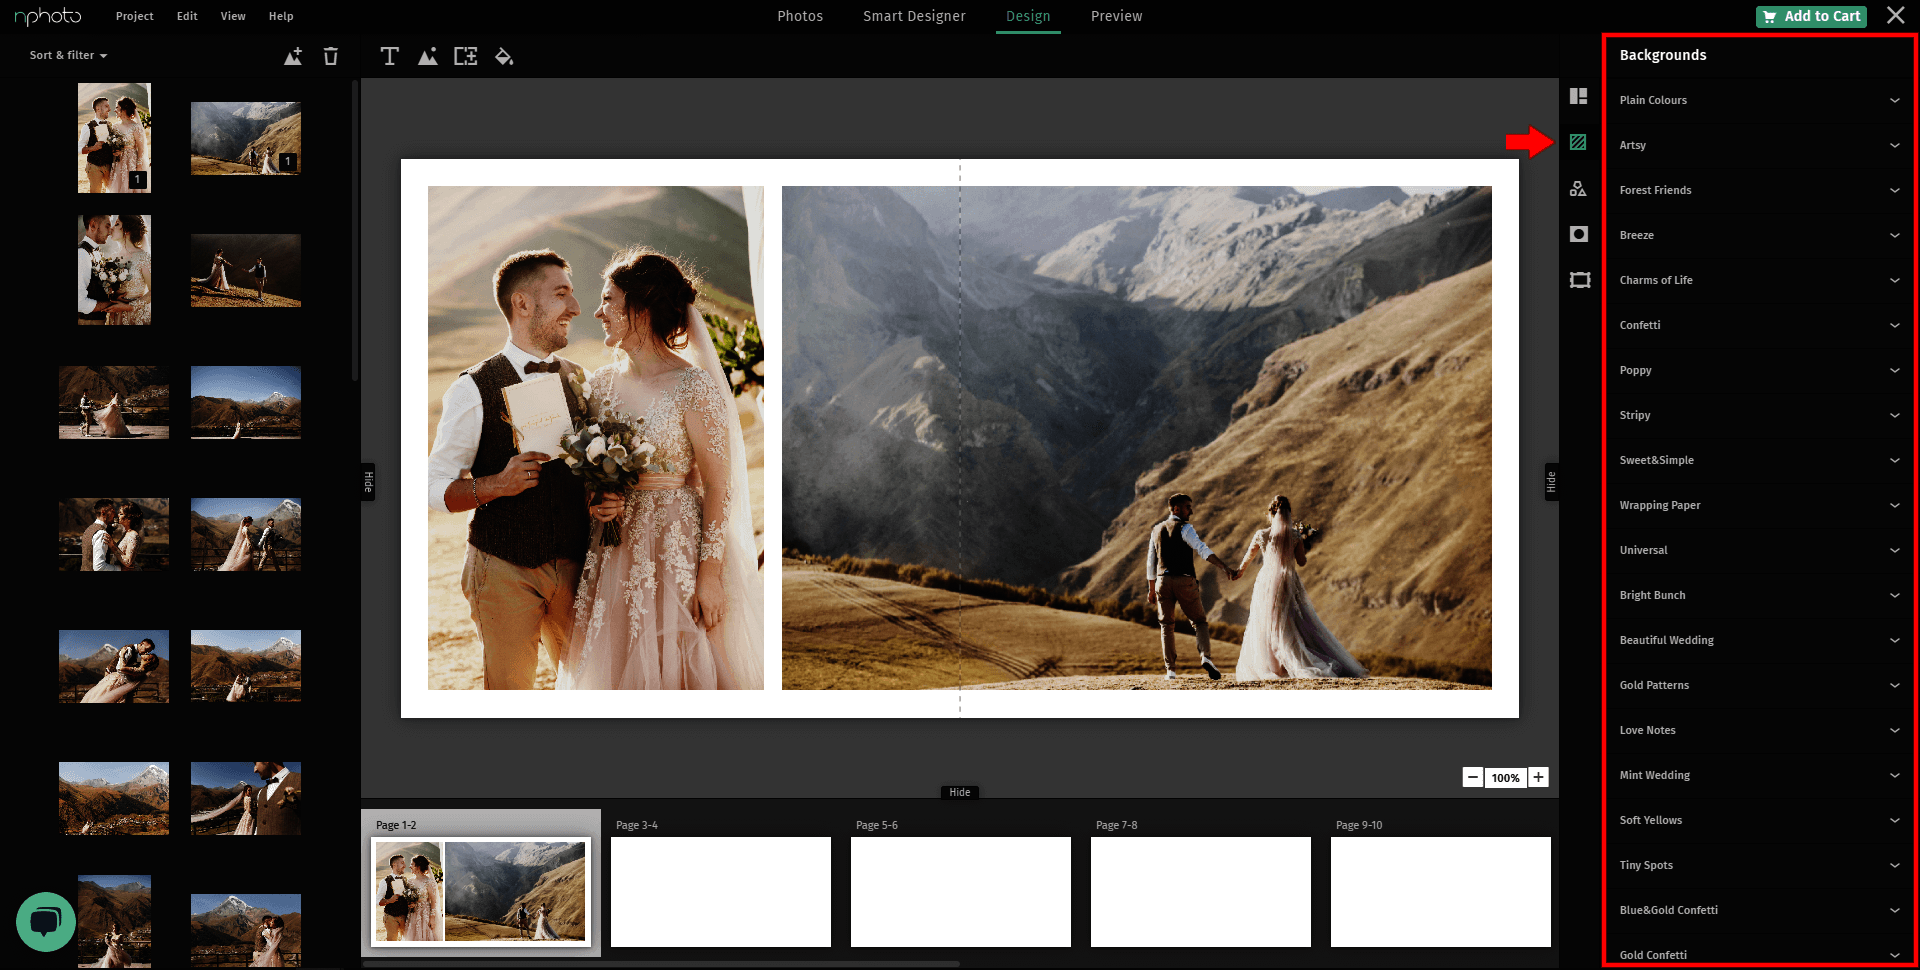
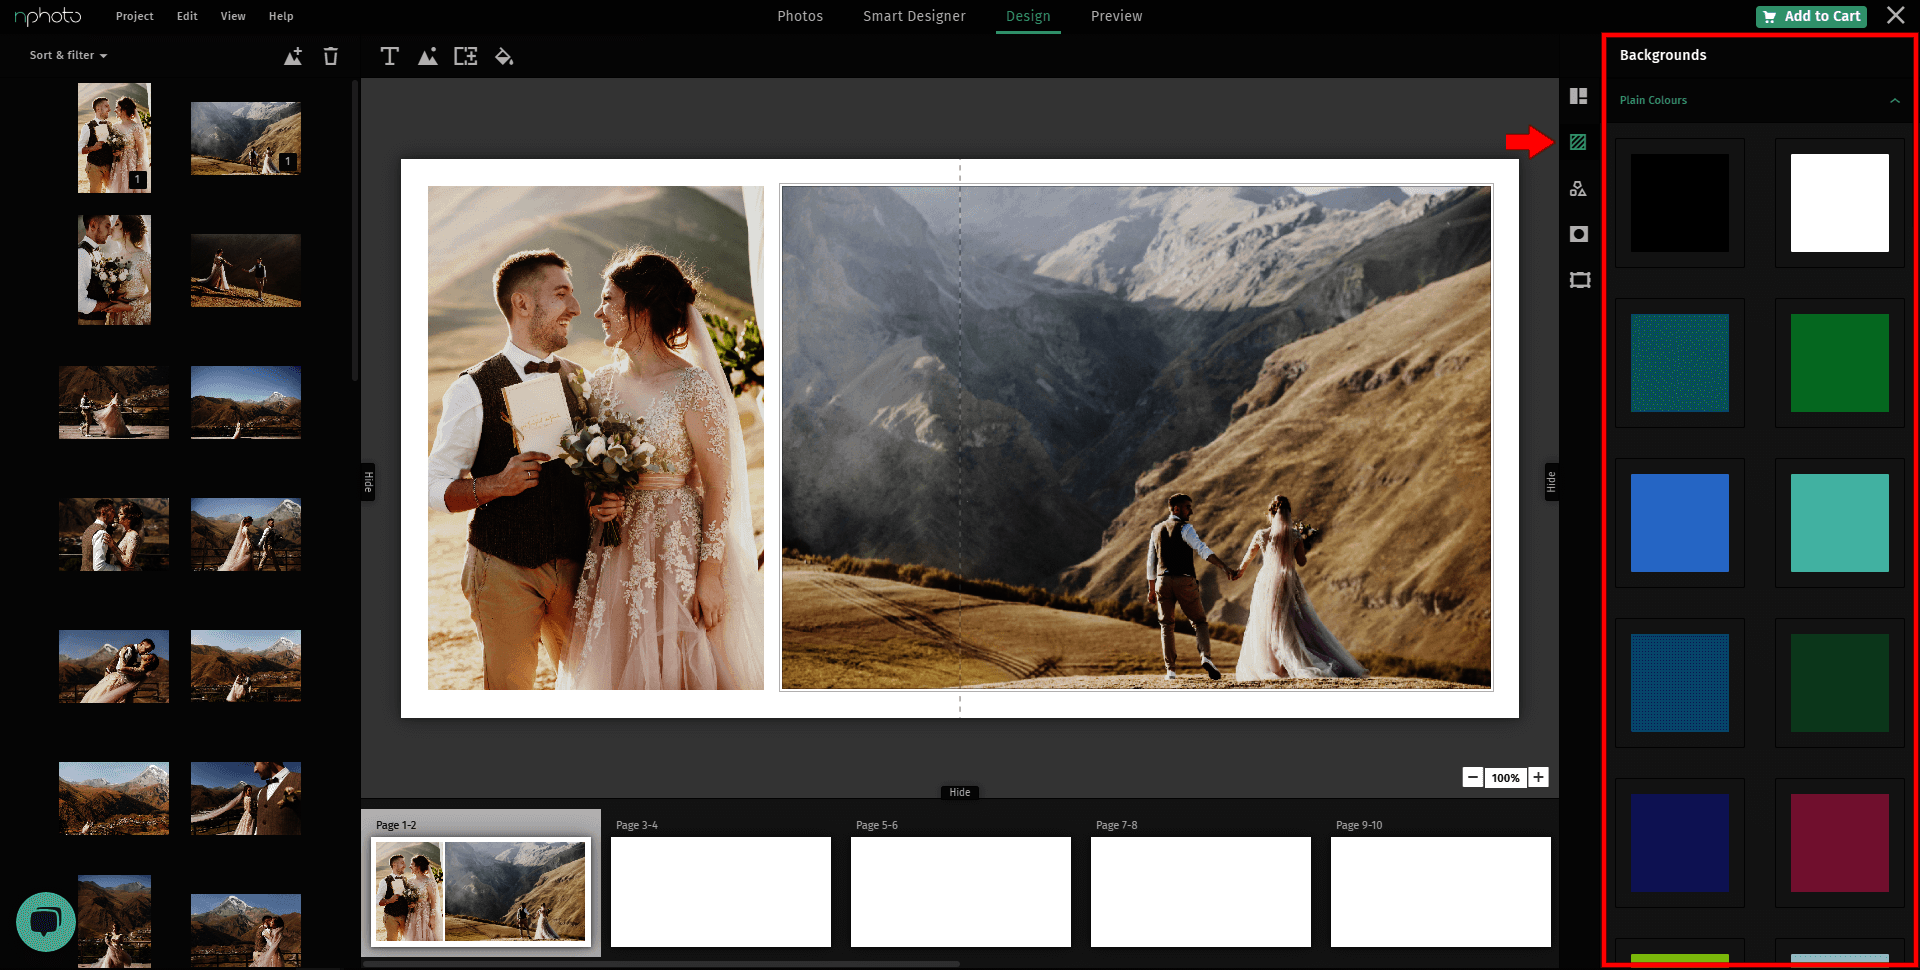
15. BACKGROUNDS
In the Backgrounds section, you can find both plain and ready-made backgrounds. They are organized into appropriately named tabs. When you select the one you like, simply drag it onto the design. You will see three green fields appear, drop it to the appropriate one.
The left/right fields will fit the background onto one of the pages, while the center field will apply the background onto a full spread. You can modify background opacity and other features when double-clicking on the background. When you're finished just click Done.
Tip: You can also set any photo as a background.
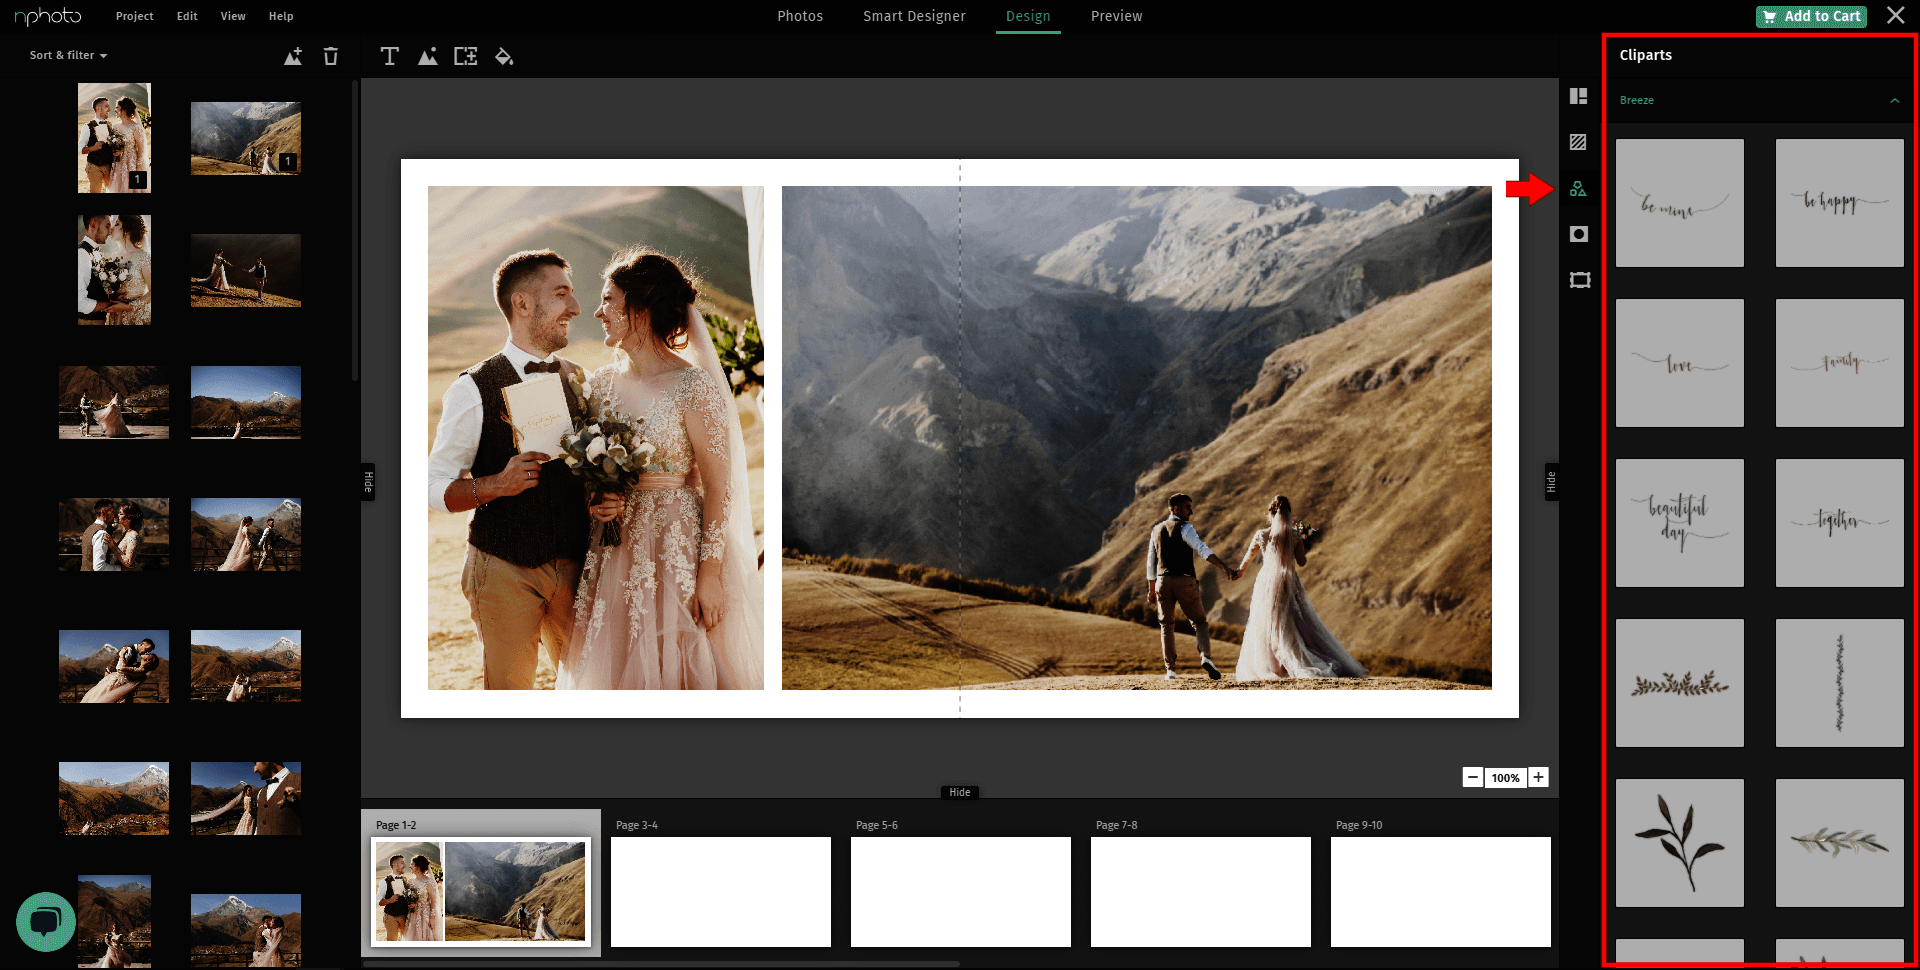
16. CLIPARTS
These are items/images/graphics which you can use in your project. You have several clip art categories to choose from. They are thematically arranged on the menu bar on the right. To apply them onto a page or spread of your product just drag the element onto an area on your project.
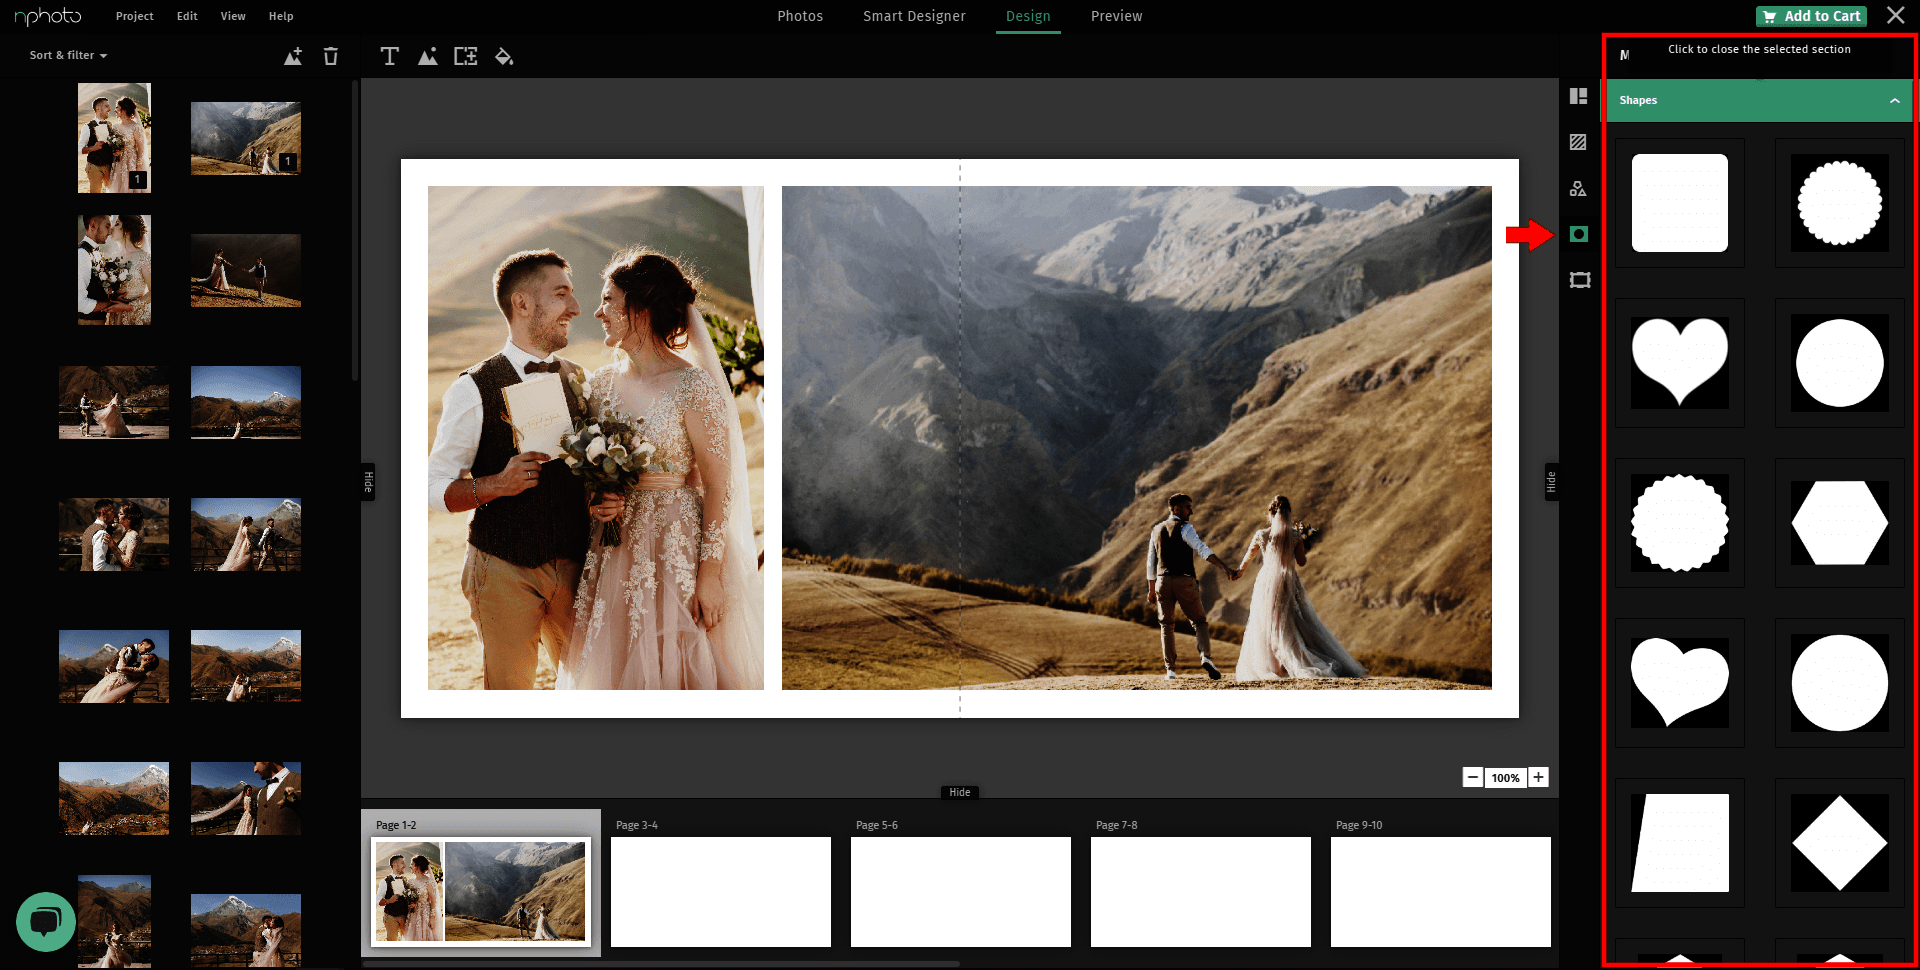
17. MASKS
Masks can be found on the right side of the menu bar in the Design mode.
18. FRAMES
In the nDesigner Pro, on the menu bar on the right, you will find four frame categories to choose from, which can be applied simply by dragging them over onto the selected image.

19. KEYBOARD SHORTCUTS
Select all = Ctrl + a / Command + a
Remove = Delete / Backspace
Copy = Ctrl + c / Command + c
Cut = Ctrl + x / Command + x
Paste = Ctrl + v / Command + v
Undo = Ctrl + z / Command + z
Redo = Ctrl + y / Command + Shift + z
Move left = left arrow
Move right = right arrow
Move up = up arrow
Move down = down arrow
Move by greater jump = Shift + arrow
Scaling while maintaining proportions = Shift + scaling
Move in the vertical and horizontal axis = Shift + change of position
Rotation by 15 degrees = Shift + rotation
Select multiple photos = by holding Ctrl + clicking on the chosen images
Select consecutive photos = click on first image and then while holding Shift you click on the last one, this way all photos between first and last will be selected.
Group objects = Ctrl + g / Command + g
Un-group objects = Ctrl + Shift + g / Command + Shift + g
Accept/Confirm = Enter (e.g. when choosing from the list in the drop-down menu or confirm on popups)
Close pop-up windows = Esc (exit the current context / view, not accepting the popup menu, exit with the drop-down menu type controller, colour selection, etc.)
Zooming in and out = Alt + scroll wheel
Moving around the design area = Alt + click and drag (hand tool)
20. FREQUENTLY ASKED QUESTIONS
What products can be designed using nDesigner PRO?
Photo albums, Photo Books, DreamBooks 4K, Accordion Mini Books, and DUO Lites.
How long is the project I ordered stored?
After 400 days from the date of purchase, the project will be removed.
IMPORTANT: If you want to extend the validity of a particular project just copy the order and place it in the basket. This will extend its validity by 180 days.
How long is the project I made but not ordered stored?
After 180 days from the date of the last edit, we remove them.
IMPORTANT: If you save your project again, up to 23:00 on the day it expires, it will be valid for another 180 days.
Projects involving standard prints are stored for 90 days.
How long is a project ordered but not paid for stored?
Unpaid orders are deleted after 90 days.
Can I download a project to my computer?
Not yet. We are working to make this option available.
How to copy a project?
Click “Copy Project” next to your design to duplicate it into another order in your open cart. Only projects with the same product lineup, identical number of pages/spreads and size ratio can be copied.
How to edit a project?
You just click the Edit option in the basket, right next to the project preview.
Can I change the product I’m designing?
You can edit features by clicking "Edit Product options", but once a project is started, certain options (like photo album size) may be locked. To unlock them, delete the project first.
How many photos can I upload?
We recommend not uploading more than 1000 files. However, if you do so, the software will slow down significantly.
What file size should my photos be?
The maximum file size of one image is up to 40 MB, with a resolution of up to 60 Mpix and dimensions on the long side no larger than 15,000 pixels.