Photo Calendar
PHOTO CALENDAR
Creating a Calendar in our Online Designer is easy and intuitive. This software allows you to design varied calendar projects.
Before you start designing, select the type of calendar in the nShop (Photo Calendar Basic or Photo Calendar HD) these are options that you will not be able to change while working with the editor. To change the size you will have to start a new project.
Below you’ll find short instructions, on how to create your own photo calendar. If you designed a calendar using our templates, choose the product you designed in the nShop and then select Blank Theme and upload your files.
DESIGNING YOUR PHOTO CALENDAR BASIC
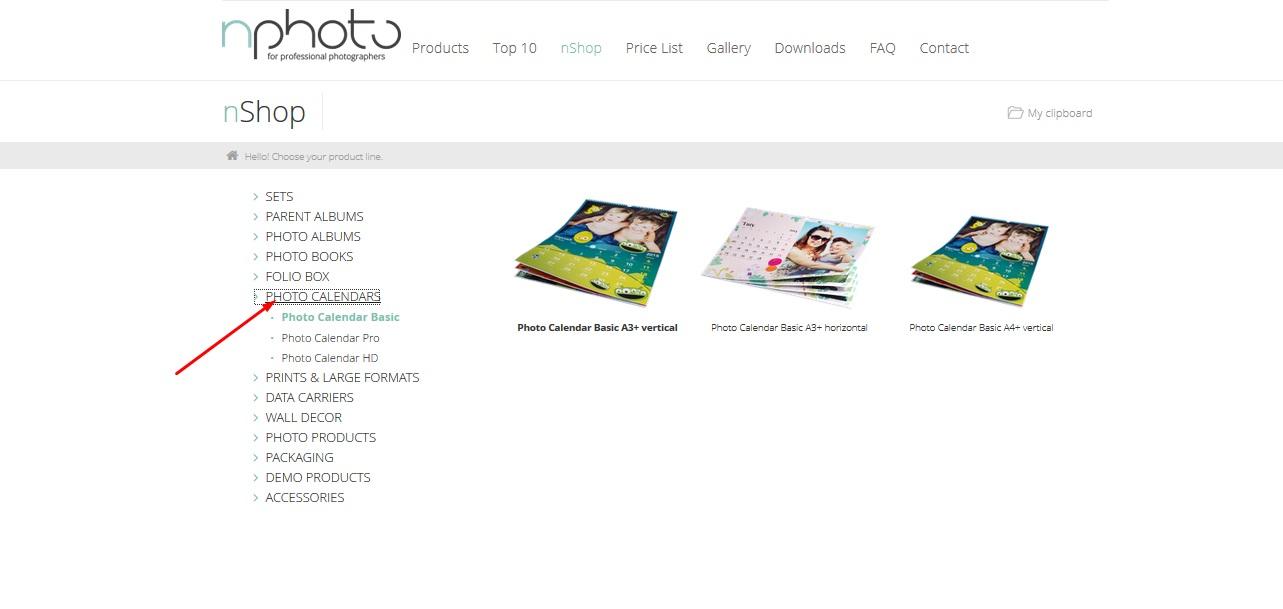
1. Select the size of your calendar. You can do this from the ‘Photo Products’ tab in the ‘Products’ tab or go straight to the nShop and select ‘Photo Calendar’.
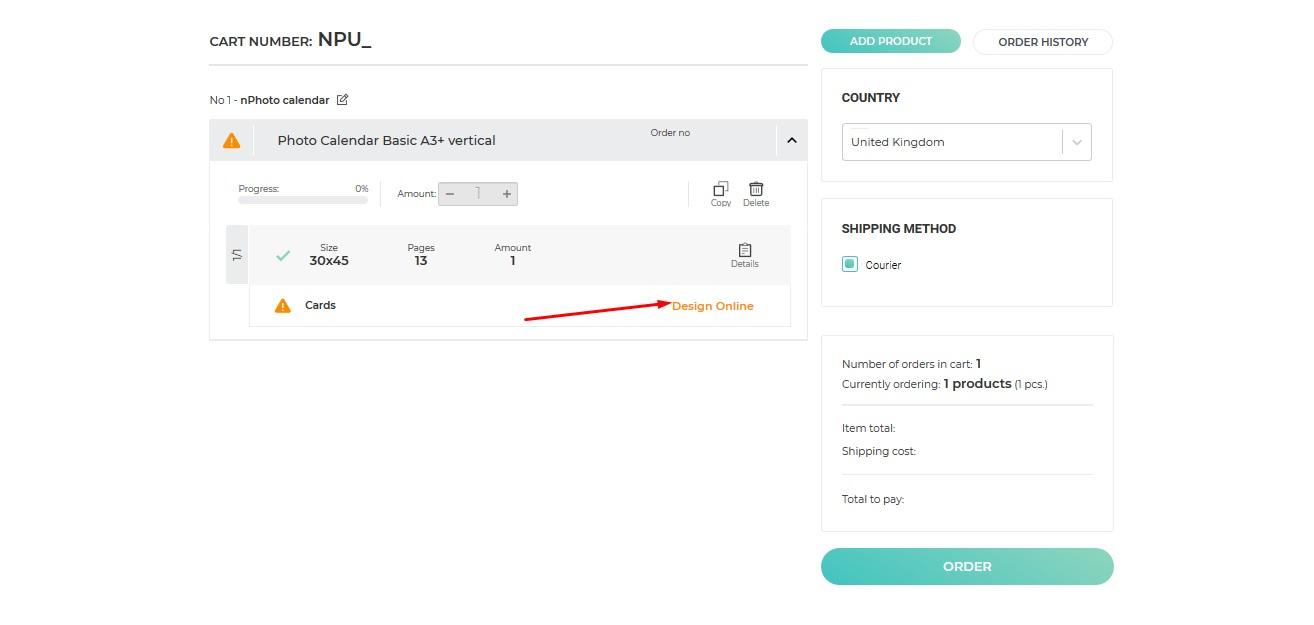
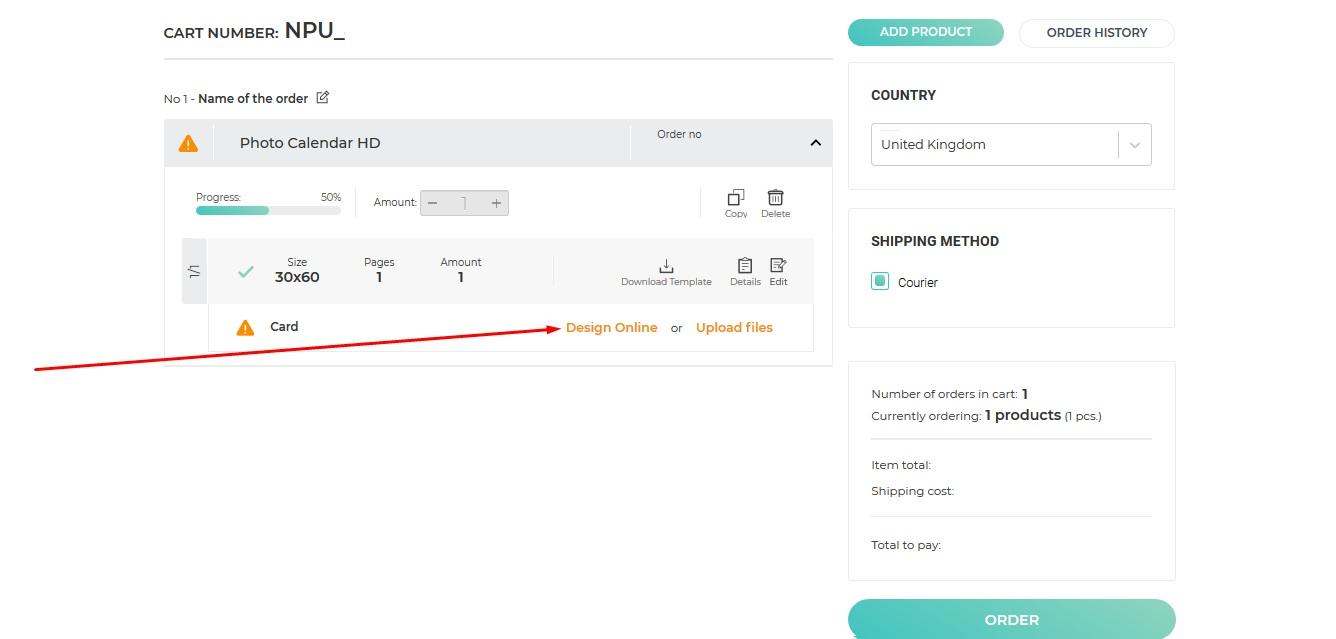
2. You will be transferred to your cart, where you will see the orange button 'Design Online'
3. You can choose to start a New Project which is a totally blank template or start designing with one of our pre-made nPhoto Templates which you can personalise.
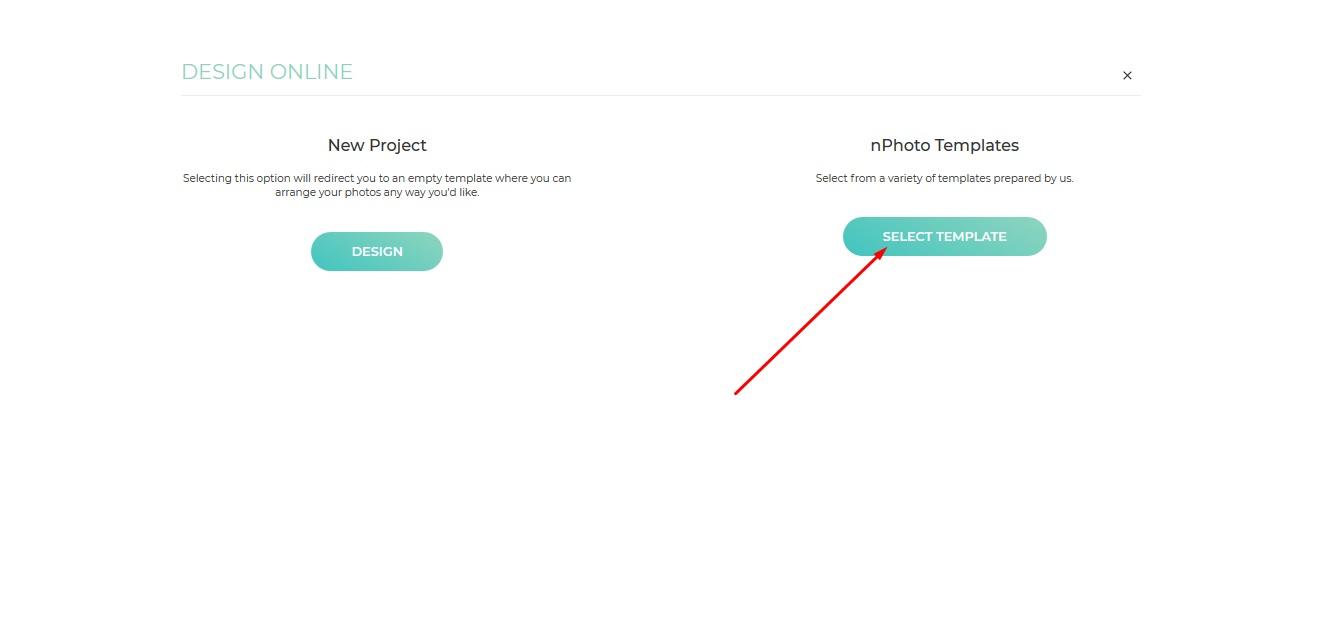
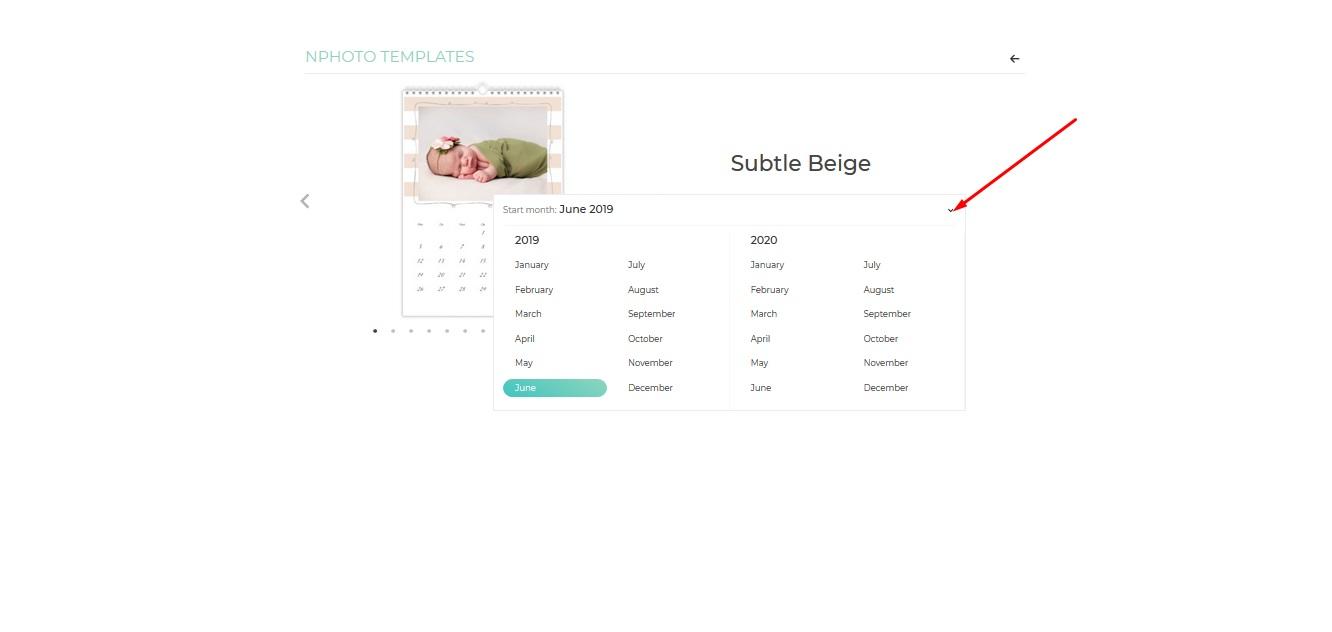
4. Select one of our pre-made templates that you can later personalise.

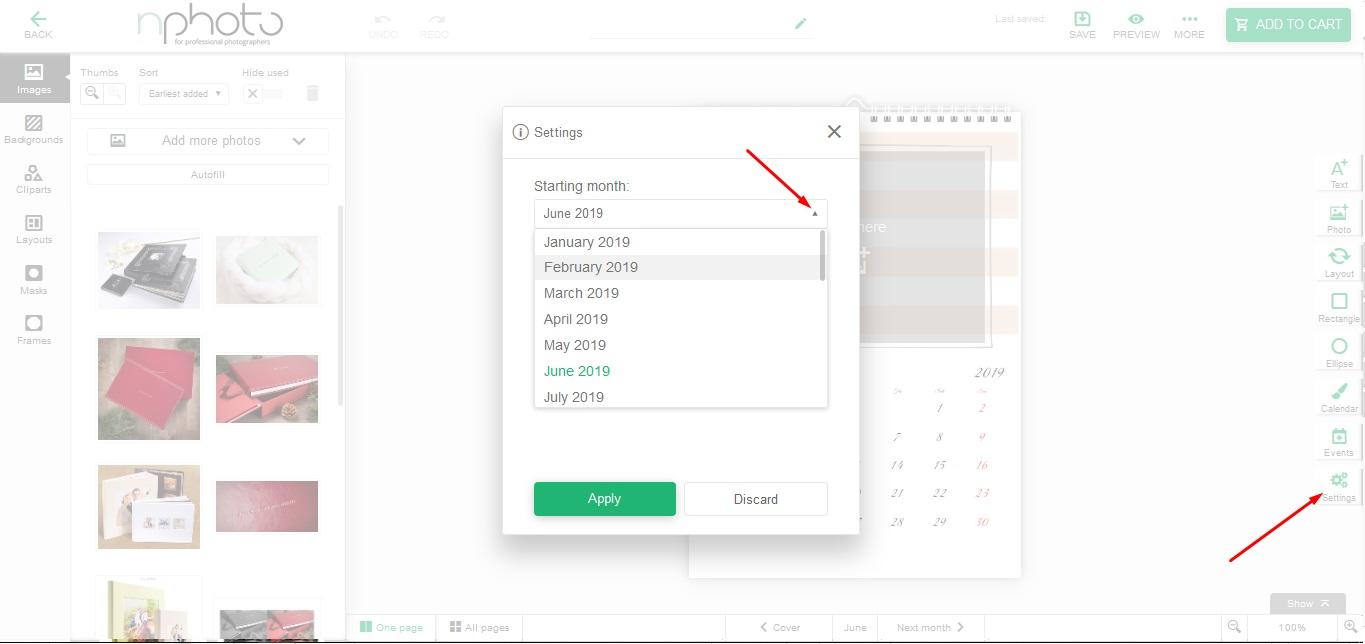
5. Select a starting month and start designing.
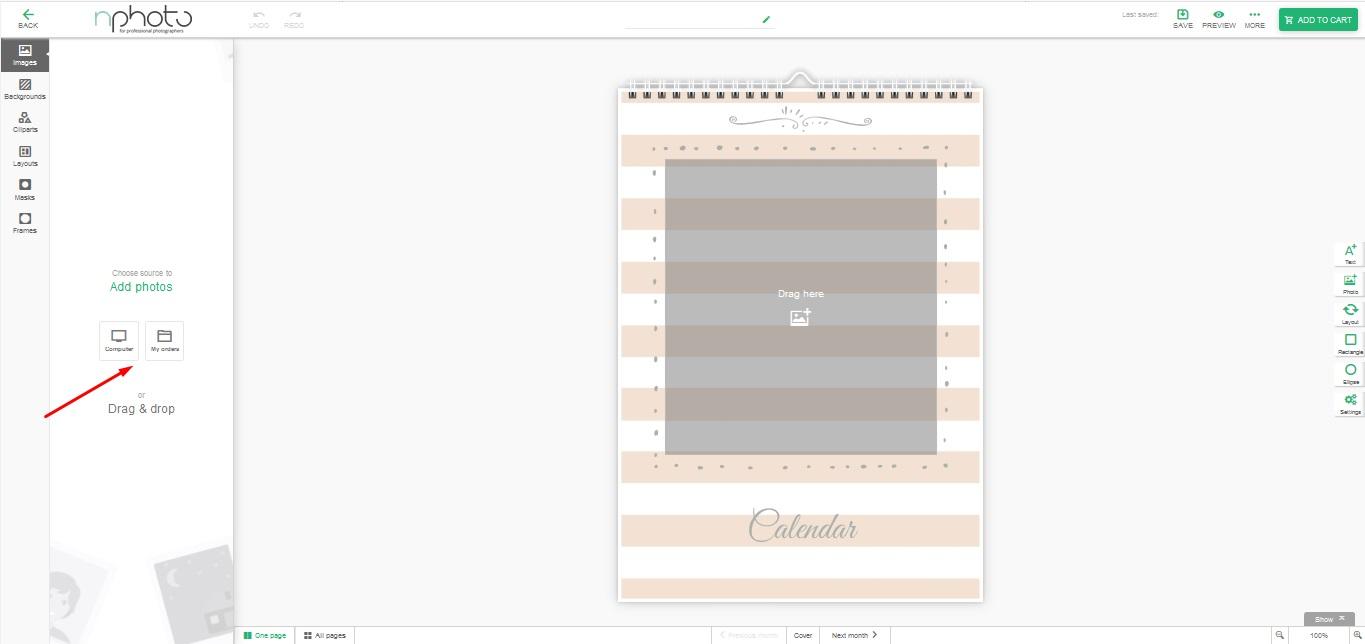
6. Add images from your Computer or use images from a previous order in My Orders.
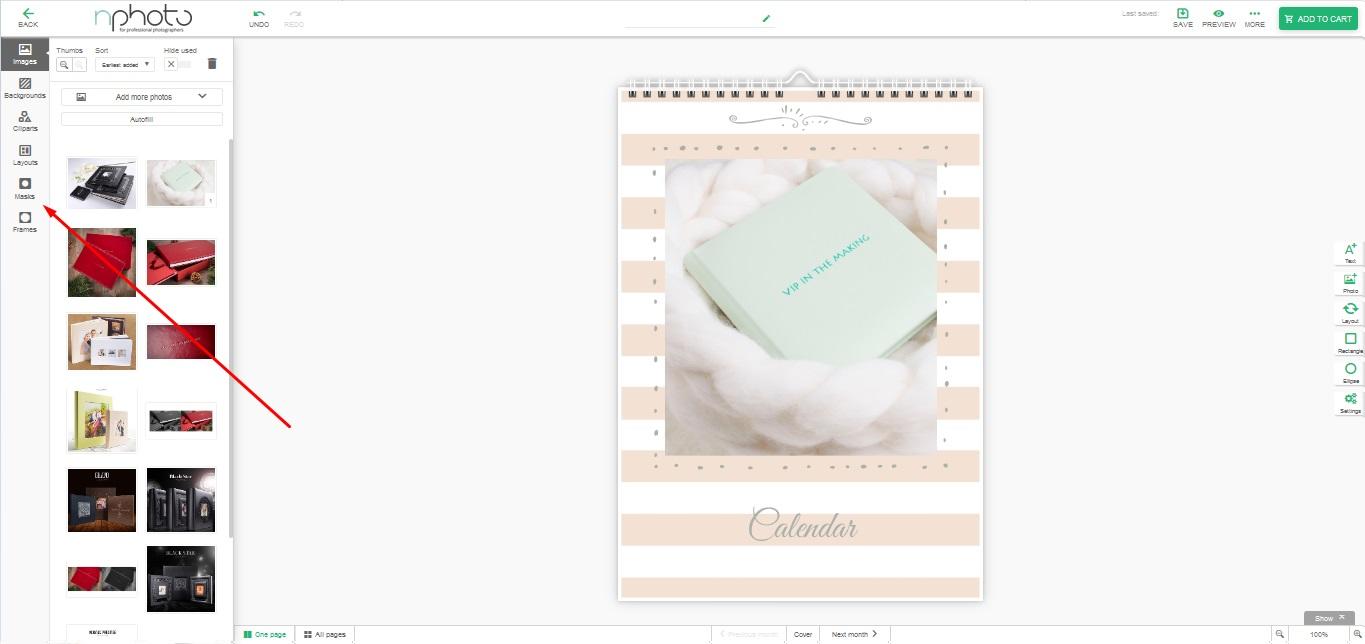
7. Feel free to select fancy frames, colorful backgrounds, funny cliparts, and decorative masks.
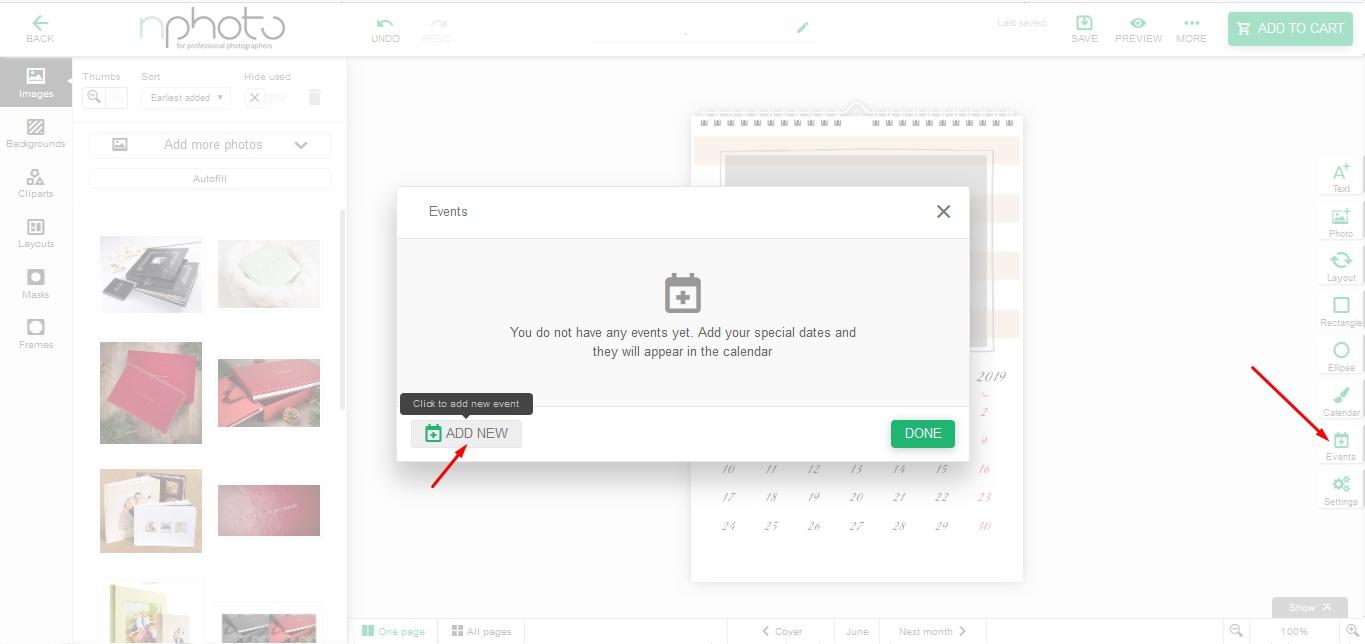
8. Add events, special dates, anniversaries or change the colours of the days of the weekend.

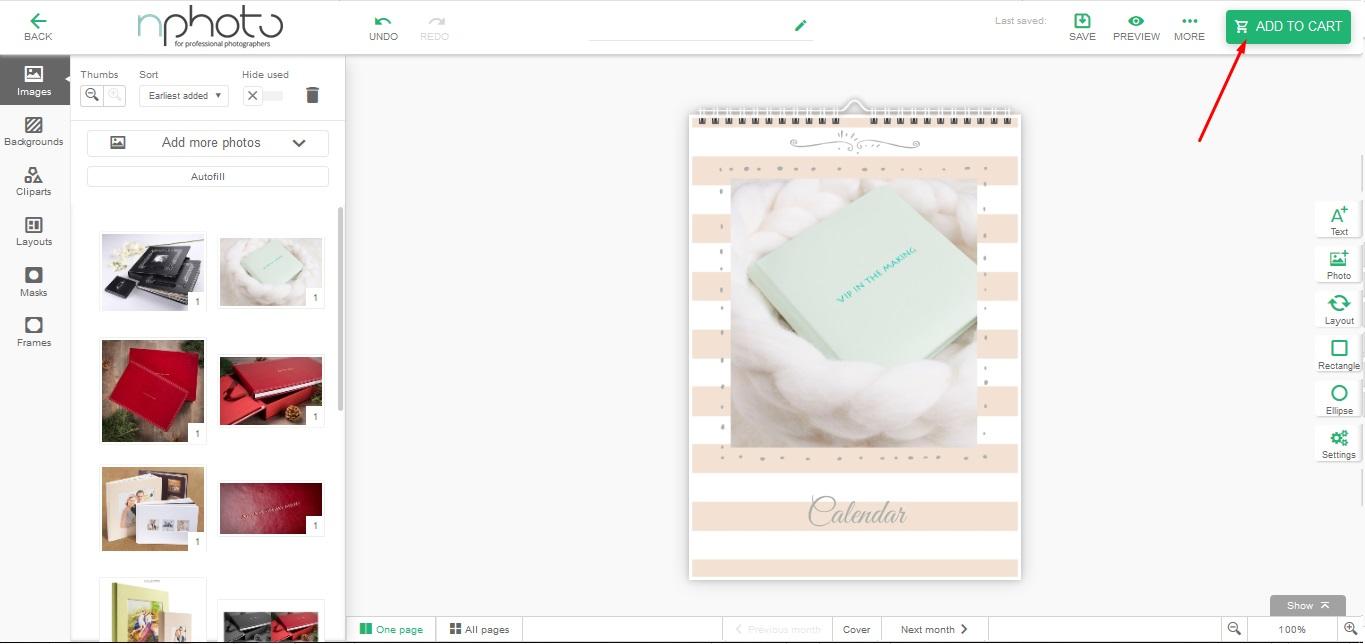
9. When you are finished and satisfied with your design, add it to your cart.
DESIGNING YOUR PHOTO CALENDAR HD
1. Select Photo Calendar HD from nShop, choose its size and add it to your basket.
2. Then choose whether you want to make a design on our template (see "Downloads") and then upload a file or take advantage of our nDesigner and make your design online.
3. Once it is ready, add another item to your shopping basket or proceed by clicking the 'Order' button.
PHOTO CALENDAR DESIGNING TIPS & TRICKS
1. To change the starting month, go to settings.
2. Feel free to change the colours of month names, number, and weekdays.

3. Mark your special events, i.e. anniversary, birthday, parties etc.